Showing posts with label Lactose Free. Show all posts

Wednesday, November 5, 2014

Vegan Chocolate Silk Pie Bites

My roommate has a chocolate silk pie recipe that has literally been passed down for generations and it is unreal, but it also unfortunately has dairy in it. I attempted to make a suitable substitute (can't quite call it a replacement) by combining nuts and chocolate. It was a simple enough idea, but the final result was more like a truffle bite than a chocolate pie. They are rich and incredibly decadent, but they sure are good.

Vegan Chocolate Silk Pie Bites


Prep Time: 15 minutes
Cook Time: 0 minutes
Total Time: 15 minutes

Ingredients:
  • 12 oz vegan chocolate chips, melted
  • 2 cups cashews, soaked in hot water
Instructions:
  1. Line a mini muffin tin with liners. In a food processor, process the cashews until they form a thick cream. With the machine running, add the melted chocolate chips. Scrape down the bowl and process until combined. Scoop small amounts into each of the prepared cupcake liners. Allow the bites to set in the fridge or freezer for at least 30 minutes. They can be eaten frozen, although they are great at room temperature as well. Store any leftovers in the freezer.


Monday, September 29, 2014

The Best Mediterranean Potato Salad of All Time

Moment of truth, I do not care for mayonnaise. It is not a favorite condiment of mine. That being said I also don't care for casseroles. Many of them taste fine, it's more the mystery of what they contain that deters me from digging in. They vary in density, consistency, and many other features, making them all in all far too variable for me to enjoy. I feel so much better for having gotten that off my chest. Now we can move forward.

For the longest time, I did not eat potato, egg, or chicken salad, because of their casserole-like qualities and the copious amounts of mayonnaise often used in their preparation. However, I now eat potato salad, and it is vegan, it is healthy, and it is mayonnaise free!

This potato salad is mustard-based, seasoned with fresh mint, parsley, salt and freshly-ground black pepper. It has a great consistency, and all of the ingredients are clearly identifiable.

Mediterranean Potato Salad


Prep Time: 15 minutes
Cook Time: 20 minutes
Total Time: 35 minutes

Serves 4 to 6


Ingredients: 
  • 4-5 medium red-skinned potatoes, rinsed, drained and cut into 1 inch cubes
  • 1 cup green beans, cut into 2 inch long pieces and steamed until crisp and bright green*
  • 1 can chickpeas, rinsed and drained
  • 1/2 cup fresh parsley, chopped
  • 1/2 cup fresh mint, chopped
  • 2 tbs sliced marinated olives, I use kalamata
  • 1 tbs capers, rinsed and chopped 
  • 2 tbs olive oil
  • 2 tbs balsamic vinegar
  • 2 tbs whole grain mustard
  • 1 tsp salt
  • 1/2 tsp ground black pepper


Instructions:
  1. Boil water in a large heavy bottom stock pot over medium-high heat. Once the water is boiling, add your potatoes. Boil them until they are easily pierced by a knife, but are still firm, 10-15 minutes. Drain your potatoes in a colander and let them cool while you prepare the dressing. Do not run cold water over them to expedite this process. 
  2. While your potatoes are cooking, combine the olive oil, vinegar, mustard, salt and pepper in a small bowl and set aside. 
  3. Return the potatoes to the pot or to a serving dish. Add the green beans, chickpeas, parsley, mint, olives, and capers and toss to combine. Drizzle the oil and vinegar dressing over the contents of the bowl and toss until everything is lightly coated with dressing. You can serve this salad warm or chilled. 
Notes*
If you like your green beans to be very crisp, then you can cut them and place them in the bottom of the colander. When you drain your potatoes, pour the hot water over the green beans. Once the potatoes have cooled slightly, return the green beans and the potatoes to the pot and proceed with the recipe. 

Adapted from Williams Sonoma

Sunday, September 28, 2014

Pumpkin Gingerbread Cake with Pecan Streusel Base

I am a huge fan of Fall foods. Having grown up in the north, I am of the mindset that food, like produce, has its own season. Some of my favorites are greens (collard, mustard, kale, etc.), root vegetables, apples in any form, and copious amounts of pumpkin. What are some of your favorite fall flavors or foods? I'm always looking to try new foods! Since we have just officially started Fall, I can now eat the above foods to my heart's content!!!

I had a can of pure pumpkin that I needed to use, so I started tossing ingredients together in a bowl, and I was really pleased with the final result. This is surprisingly versatile too. If you would rather have a pumpkin gingerbread loaf, then omit the streusel base in the pan and bake just a few more minutes. This recipe is great by itself or topped with a dollop of spiced cashew cream or even a little apple butter.

Omitting the streusel base, cuts out sugar, but it does not take away from the final product. With or without added brown sugar, this recipe is fabulous and sure to be a new Fall staple.

Pumpkin Gingerbread Cake with Pecan Streusel Base


Prep Time: 15 minutes
Cook Time: 45 minutes - 1 hour
Total Time: 1 hour - 1 hour 15 minutes

Yields 24 pieces

Ingredients:

Cake:

  • 1/2 cup molasses
  • 1/2 cup maple syrup
  • 1 15 oz. can 100% pure pumpkin
  • 4 flax eggs (4 tbs ground flax and 8 tbs water)
  • 1 cup white rice flour
  • 1/3 cup buckwheat flour
  • 3 tbs tapioca starch
  • 1 tsp salt
  • 1 tbs ground cinnamon
  • 1/2 tsp ground ginger
  • 1/4 tsp ground nutmeg
  • 1 tsp baking soda
  • 1/2 tsp baking powder
Streusel Base (Optional)
  • 1/4 cup brown sugar
  • ground cinnamon
  • 1/4 cup chopped pecans
Instructions:
  1. Preheat the oven to 350 F and line two 9x9 square baking pans or a 9x13 cake pan with parchment paper. If you are using the streusel base, then sprinkle 2 tbs brown sugar into the bottom of each lined pan. Sprinkle cinnamon evenly over the brown sugar, then sprinkle 2 tbs of the pecans over the cinnamon in each pan. In a measuring cup, whisk together the flax and water to form your flax eggs and let them set while you mix the cake together. 
  2. In a large mixing bowl, combine the molasses, maple syrup, and pumpkin. In a separate bowl, combine the flours, starch, salt, spices, baking soda and baking powder. 
  3. Add the flax eggs to the pumpkin mixture and whisk to combine. Add the dry ingredients to the wet ingredients and whisk until just combined. 
  4. Divide the batter between the two pans, and bake until a toothpick inserted in the center comes out clean, 45 minutes to 1 hour. Remove the pans from the oven and allow them to cool slightly before serving. You can serve the cake warm directly from the pan or cool completely and invert if you want to remove the cake from the pan. 

Thursday, September 25, 2014

Big Sky Bakery Inspired Bread

There's a bakery in Birmingham that bakes a delicious 7 seed bread. Unfortunately, it contains wheat flour and I can no longer eat it. The bread is a moist and sweet brown loaf studded with seeds throughout and rolled in sunflower seeds. I loved it, and I missed it...until I came across this recipe.

The flavor of this bread is so similar to Big Sky Bread and makes for a great breakfast or snack. It's incredibly hearty and filling and loaded with healthy seeds and nuts!


Big Sky Bakery Inspired Bread


Prep Time: 2 hours
Cook Time: 50 minutes
Total Time: 2 hours 50 minutes

Yields 1 loaf


Ingredients:
  • 1 cup raw sunflower seeds, you can use seasoned ones if you want a different flavor
  • 1/2 cup flax seeds
  • 1/2 cup raw almonds or other nuts
  • 1 1/2 cup gluten free old fashioned rolled oats
  • 2 tbs. chia seeds
  • 3 tbs psyllium seed husk powder
  • 1 tsp fine grain pink Himalayan sea salt
  • 1 tsp ground cinnamon (optional)
  • 1/2 cup dried cranberries or other fruit (optional)
  • 1 tbs maple syrup
  • 1/4 cup apple sauce
  • 1 1/2 cups water
Instructions:
  1. Line a loaf pan with parchment paper and set aside. In a large bowl mix the sunflower seeds, flax seeds, almonds, oats, chia seeds, psyllium, salt, and cinnamon and cranberries if using. 
  2. In a measuring cup, mix together the maple syrup, apple sauce and water. Pour the mixture over the dry ingredients and mix until a thick dough forms. 
  3. Transfer the dough to the prepared loaf pan and smooth out the top of the loaf. Let the loaf rest for at least 2 hours and up to overnight on the counter. The dough is ready to be baked when you can tug at the side of the parchment paper and the dough retains its shape. 
  4. Heat the oven to 350 F. Bake the loaf on the middle rack for 20 minutes. Remove the loaf from the pan and place it upside down on the oven rack. Bake for an additional 30 to 40 minutes. The bread is done when it sounds hollow when tapped. 
  5. Let the bread cool completely before slicing. This bread should be stored in an airtight container in the fridge for a week or for three weeks frozen. Slice before freezing.


Adapted from My New Roots

Saturday, September 13, 2014

"Semi-Alfredo" Pasta Caprese

I have been eating pasta caprese for years now. I have also always loved Alfredo sauce, although it does not love me in return (lactose intolerant). Having been turned on to almond milk, and loving the way it cooks pasta, I decided to give classic Alfredo sauce a modern makeover while simultaneously pairing it with my favorite tomato sauce.

Sometimes fusions work very well, and sometimes they don't. I am happy to say this was one of those times that the heavens were aligned in favor of a glorious marriage between two classic Italian dishes.

By cutting out the rich creams traditionally used in preparing Alfredo sauce, I was able to rekindle an old passion, this time I felt love in return.


"Semi-Alfredo" Pasta Caprese


Prep Time: 15 minutes
Cook Time: 15 minutes
Total Time: 30 minuts

Serves 4 to 6


Ingredients:
  • 1/4 cup olive oil
  • 1-2 tbs lemon juice
  • 2 cloves garlic, miced
  • kosher salt and pepper to taste
  • 3-4 ripe tomatoes, diced into 1/2 inch pieces
  • 1/4 cup fresh basil, chopped
  • 1 (14 oz) package of XL wide rice noodles (you can use rice shells, fusilli, etc. or normal wheat pasta if you are not gluten free)
  • 4 cups almond milk
Instructions:
  1. In a small bowl, combine the olive oil, lemon juice, garlic, salt, pepper, tomatoes and basil and set aside to marinate at least 15 minutes. Do not let the tomatoes marinate for  more than 30 minutes. 
  2. In a large saucepan, bring the almond milk to a boil over high heat. Add the pasta, reduce heat to medium, and simmer until the pasta is cooked through and most of the liquid has been absorbed or cooked out. 
  3. Without draining the pasta, add the marinated tomatoes to the pasta and stir to combine. Serve warm.

Gluten Free Chocolate Chip Cookies

I've come across several gluten-free/vegan dessert options that incorporate beans of all types, and I've recreated several of those recipes. For the most part, I am not a fan. It's a difficult task to balance health and sweet delectable chocolatey desserts. This recipe is one of those recipes that I tried and actually liked. Actually, I loved it. I've made some changes and some variations and they've all been great!

My vegan sister and brother-in-law love them. In fact, if I plan a visit home, my brother-in-law  asks whether I have time to bake some cookies or not and I'm more than happy to oblige! Food is one of my love languages, and it makes me so happy to sit around the kitchen table with my family sharing a dozen cookies between us. As we savor the cookies, we recant old stories and new ones. Forming memories, one bite at a time.

Gluten Free Chocolate Chip Cookies


Prep Time: 10 minutes
Cook Time: 10 minutes
Total Time: 20 minutes

Yields 18 cookies


Ingredients:
  • 1 14.5 oz can of chickpeas
  • 1/2 cup plus 1/8 cup PB2 powder or equivalent amount of nut butter
  • 1/4 cup water or almond milk (only if you use the PB2 powder)
  • 1/4 cup maple syrup (or 1/4 cup honey)
  • 2 tsp vanilla extract
  • 1 tsp baking powder
  • 3/4 cup chocolate chips (substitute vegan or carob chips if desired)
Instructions:
  1. Preheat the oven to 350 F and line two baking sheets with parchment paper. In a food processor, process the chickpeas until they form a grainy paste. Add the PB2 powder, water (if using), sweetener, vanilla, and baking soda, and process until smooth. Stir in the chocolate chips*. 
  2. Roll the dough into golf ball sized pieces and arrange on the cookie sheets. If you prefer your cookies to be more disc-like, then flatten the balls slightly on the sheet, if not, then they will cook into small mounds. Bake for 10 minutes or until cookies retain their shape but are still soft when you press on them.
Notes*
If you add the chocolate chips to the food processor and pulse to incorporate them, then your cookies will have chocolatey fudge swirls in them. Yum! 


Ancient Grain Breakfast Porridge

I've lived in the north and in the south for extended periods of time. I've found that northerners and southerners are quite proud of their breakfast options, and quite loyal to them. Up north, we ate porridge, or cream of wheat/rice etc. In the south, you will almost certainly find grits, bacon and biscuits on the breakfast table. I've been fortunate enough to develop a taste for porridge and grits, so I don't feel at odds at anyone's breakfast table, but every now and then I like to branch out and try a new take on an old classic.

I've found myself experimenting with several new grains lately. I didn't even know what quinoa was 3 years ago, and now I don't remember life without it. Breakfast is said to be the most important meal, so why not pack in the healthy grains early on in your day?

Unlike instant breakfast porridge, or most cereals for that matter, this recipe is not loaded with sugar and preservatives and is delicious by itself or with fresh or dried fruit, or a spoonful of apricot preserves.

Ancient Grain Breakfast Porridge


Prep Time: 0 minutes
Cook Time: 20 minutes
Total Time: 20 minutes

Yields 1 serving


Ingredients:
  • 2 tbs quinoa, rinsed
  • 2 tbs amaranth
  • 2 tbs polenta
  • 1 1/2 cup water or almond milk
  • Any toppings you desire, fruit, jam, nuts, etc. 
Instructions: 
  1. In a small saucepan, combine the quinoa, amaranth, polenta, and water or milk. Bring to a boil, then reduce the heat to medium-low and simmer, stirring occasionally,  for 15-20 minutes, until the liquid has been absorbed and the grains are tender. 
  2. Transfer to a bowl and top with your desired toppings.


I swirled in some pistachios and a dollop of apricot preserves

Thursday, September 11, 2014

Vegan Peanut Butter Cups

I grew up 30 minutes away from Hershey Park, so my love affair with Hershey candy started at an early age. Unfortunately for Hershey, as I got older I fell out of love with sugary treats and fell in love with decadently dark chocolate. However, there are some flavor combinations a girl doesn't like to go without, take peanut butter cups for instance.

While I'm on the subject of peanut butter cups, I'll take a moment to acknowledge what a brilliant idea they were! Thank you Mr. Milton Hershey for your chocolate bars, and thank you Mr. George Washington Carver for introducing peanut butter in the 1880s. Okay, enough history for the day, lets whip up some homemade peanut butter cups.

For this recipe you can either make your own chocolate cups, it's incredibly easy, or buy some chocolate cups for desserts or cordials at a grocery store. Below, I give the instructions on how to make your own, but just skip that part if you buy cups from the store.

Vegan Peanut Butter Cups


Prep Time: 45 minutes
Cook Time: 0 minutes
Total Time: 45 minutes

Makes approximately 10 mini cups

Ingredients:
  • 6 oz chocolate bar or chocolate chips (make sure to use vegan chocolate to keep the recipe vegan), I prefer 70% or darker
  • 1/2 cup peanut butter, home made or store bought, melted
  • mini cupcake liners
Instructions:
  1. Place a mini cupcake pan in your freezer for at least 15 minutes. If you are using pre-made chocolate cups, then skip to step 2. Melt the chocolate in a double boiler on the stove. Once the chocolate has melted, pour about 1/2 tbs into a mini cupcake liner and roll the liner around to coat the sides. Remove the pan from your freezer and place your chocolate coated-liners in the tin. Set the pan in the fridge and let the chocolate set for 15 to 20 minutes. 
  2. Remove the pan from the fridge. Spoon melted peanut butter into the chocolate cups until they are 80% full. Return the pan to the fridge and let the peanut butter set for 10 minutes. 
  3. Remove the pan from the fridge and top the cups with the remaining chocolate, filling the cups to the top. Return the pan to the fridge for the last time and let the chocolate set up for an additional 10 to 15 minutes. Then devour them!


Monday, September 8, 2014

Apple Ginger Breakfast Muffins

Apple Ginger Breakfast Muffins


Prep Time: 15 minutes
Cook Time: 30 minutes
Total Time: 45 minutes


Ingredients:

  • 1 cup oat flour
  • 1 cup gluten free flour (I used Bob's Gluten Free)
  • 2 tsp xantham gum
  • 1 tsp salt
  • 1 tsp baking soda
  • 1/2 tsp baking powder
  • 1/2 tsp cinnamon
  • 2 ripe bananas
  • 1/2 cup almond milk
  • 1/4 cup apple sauce
  • 1/3 cup brown sugar
  • 1 tsp ginger juice
  • 1/4 cup crystallized ginger, chopped
  • 2 medium apples, peeled, one diced into small pieces and one chopped into 1/2" pieces


Instructions:
  1. Preheat the oven to 350 F. 
  2. In a large bowl, combine the flours, xantham gum, salt, baking soda, baking powder, and cinnamon.
  3. In a separate bowl, mash the bananas and add the almond milk, apple sauce, brown sugar, and ginger. 
  4. Add the banana mixture to the flour mixture and stir until just combined. Stir in the apples and the crystallized ginger. 
  5. Line a muffin tin with liners and fill each one 3/4 full. Bake for 30 minutes. Remove from the oven and let cool 10 minutes before removing them from the pan. 

Thursday, September 4, 2014

Late Summer Harvest Peach Breakfast Muffins

In an attempt to use up the last of my delicious peaches, I whipped up some hearty peach muffins. They are filling and healthy enough to be a grab-and-go breakfast option. 

Late Summer Harvest Peach Breakfast Muffins

Prep Time: 15 minutes
Cook Time: 20 minutes
Total Time: 35 minutes

Yields 1 dozen


Ingredients:
  • 1 cup gluten free flour (I used 1/2 cup white rice flour, 1/4 cup brown rice flour, and 1/4 cup tapioca flour)
  • 1/2 cup gluten free oat flour
  • 1/2 cup gluten free old fashioned rolled oats
  • 2 tsp baking powder
  • 1 tsp cinnamon
  • 3/4 tsp baking soda
  • 1/2 tsp fine sea salt
  • 3/4 cup almond milk (or milk of your choice)
  • 1 flax egg (1 tbs ground flax and 3 tbs water)
  • 1/3 cup sugar or sweetener of choice
  • 1/2 cup peach preserves (I used Polaner)
  • 2 ripe but firm peaches cut into 1/2" cubes
 Instructions:
  1. Preheat the oven to 350 F and line a cupcake tin with paper liners. Mix together the flax egg ingredients in a small bowl and set aside.
  2. In a mixing bowl, mix together the gluten free flour blend, oat flour, oats, baking powder, cinnamon, baking soda, and salt. 
  3. Pour the milk, flax egg, sugar, and preserves over the dry ingredients and stir until just combined. Then add the peaches and stir them into the batter. 
  4. Scoop the batter into the cupcake tin and bake until a toothpick inserted in the center comes out clean, 18-20 minutes. After the muffins have baked, let them cool in the pan for 5-10 minutes before removing them from the tin.
Adapted from Pickles & Honey

Tuesday, September 2, 2014

Peach Polenta Upside-Down Cake (With Vegan Option)

It's almost the end of peach season down south, but I couldn't let it pass without making this cake one last time. Whenever I try to explain this dessert to people, I usually get some pretty odd reactions, as if the idea of a cake/cornbread was a little too far fetched. Luckily, the people who have tried it, have loved it, so give it a try and make up your own mind...I'm sure you'll love it too!

The original recipe called for loads of butter, sugar, and cream. I've lightened it up and adapted it to be gluten free and I've offered a vegan option. I have made it following the vegan substitutions several times and it is superb!


Peach Polenta Upside-Down Cake (Vegan Option)

Prep Time: 10 minutes
Cook Time: 40 minutes
Total time: 50 minutes

Serves 8


Ingredients:

  • 2/3 cup butter or apple sauce 
  • 1/4 cup and 1/2 cup sugar
  • 3-4 medium ripe peaches, skin on, pitted, and cut into 3/4" wedges
  • 1 cup polenta or coarse yellow cornmeal
  • 3/4 cup gluten free flour blend or all purpose flour(Bob's gluten-free, or your preferred blend, I used 1/2 cup white rice, 1/8 cup brown rice, and 1/8 cup tapioca starch) 
  • 1 1/2 tsp baking powder
  • 1 1/4 tsp salt (I prefer kosher for this recipe)
  • 3 eggs or flax eggs (3 Tbs flax and 6 Tbs water, mix together and let rest 10 minutes)
  • 1/2 tsp vanilla extract
  • 1/2 cup almond milk, or milk of your choice
Instructions:
  1. Preheat the oven to 350 F. Melt 3 Tbs of the butter, or heat 3 Tbs apple sauce in a 10" iron-skillet over medium heat, making sure to brush it up the sides of the pan. Sprinkle 1/4 cup suger evenly across the bottom of the skillet and cook until the sugar starts to turn a golden brown, about 3 minutes. Arrange the peaches around the outside of the skillet, then fill in the center of the skillet with the remaining slices. Reduce the heat to medium-low, and continue to cook until the juices are bubbling and the peaches begin to soften 10-12 minutes. Remove the pan from the heat.
  2. While the peaches are cooking, combine the polenta, flours, baking powder, and salt in a bowl. Beat the remaining 8 Tbs butter or apple sauce and 1/2 cup sugar for 3 minutes. Add the eggs, scrape the bowl down, then mix in the vanilla and milk. Add the flour mixture to the bowl and mix until just combined. 
  3. Drizzle the batter over the peaches and smooth out the top with your spatula. Bake until golden, and a tester inserted into the middle of the cake comes out clean 30 minutes. Let the skillet cool for 10 minutes, then run a knife around the edge of the pan. Quickly invert the pan onto a plate or cutting board and tap the bottom of the skillet to loosen the cake and peaches. Lift the skillet and reposition any renegade peaches. Cool slightly before serving. 
Adapted from Martha Stewart


Monday, September 1, 2014

Vegan Strawberry-Rhubarb Crisp

Today kicks off VeganMoFo! Day 1!!! I do not normally follow a vegan diet, but I have friends and family who do. Therefore, I accept the challenge of VeganMoFo and will post at least 20 vegan posts this month! I am so excited!!!


I was walking through the grocery store when I spotted some fresh rhubarb. I had always loved the strawberry rhubarb pies that were sold in the area where I grew up, but I had never experimented with rhubarb before. I decided that would not hold me back. I selected a few stalks of rhubarb, bagged them, bought them, and baked them. The result was this delicious little dessert!

Vegan Strawberry-Rhubarb Crisp

Prep Time: 10 minutes
Cook Time: 50 minutes
Total Time: 1 hour

Serves 6


Ingredients: 

Filling:

  • 4 stalks of rhubarb, cut into 1/2 inch pieces
  • 16 oz. strawberries, slices
  • 1/4 tsp cinnamon
  • 1/4 cup tapioca starch
  • 1/2 cup sugar
Crisp:
  • 8 oz ground almonds
  • 1/2 cup old fashioned rolled oats
  • 4 tbs brown sugar
  • 2 tsp ground flax
  • 1/2 tsp cinnamon
  • 6 tbs applesauce
Instructions:
  1. Preheat the oven to 375 F. 
  2. In a large bowl, combine the rhubarb, strawberries, cinnamon, tapioca starch, and sugar, stirring to combine. Let the mixture sit while you prepare the crisp topping. 
  3. In a separate bowl combine the almonds, oats, sugar, flax, cinnamon, and applesauce until just combined. Do not over mix. 
  4. Pour the strawberry mixture into a square glass baking dish and bake the fruit for 10 minutes. 
  5. Remove the fruit filling and sprinkle the crisp topping over the dish. Return the dish to the oven and bake for 40 minutes or until the topping is a dark brown. 

Saturday, August 23, 2014

Gluten Free Peasant Bread

When I was little, we used to bake bread...and devour it immediately after it came out of the oven. At my apartment, my bread eating habits have not changed, however my diet has. In the gluten-free world, I've found most breads to be dry, crumbly, crusty and not in a good way. With this recipe, the perfect crusty outside and chewy inside join together, resulting in baked perfection. I hope you enjoy it as much as I do!


Prep Time: 2 hours 10 minutes
Cook Time: 30 minutes
Total Time: 2 hours 40 minutes

Makes 1 loaf

Ingredients:

  • 1 cup lukewarm water, it's important that it is not too hot!
  • 1 1/2 tsp sugar
  • 1 1/2 tsp rapid rise yeast
  • 1 cup white rice flour
  • 1/2 cup brown rice flour
  • 1/3 cup tapioca flour
  • 1/3 cup buckwheat flour
  • 2 tsp xantham gum
  • 1 tsp kosher salt
  • 2 egg whites
  • 2 tbs butter, to coat the pan
Instructions:
  1. Combine the water and sugar, pour the yeast over the water, no need to stir, and let proof for 10-15 minutes until frothy. 
  2. While the yeast proofs, combine the flours, gum, salt, and egg whites. 
  3. Once the yeast has proofed, pour it over the flour mixture and combine with a spatula. 
  4. Cover the bowl with plastic wrap and allow the dough to rise in a warm place for 1.5 to 2 hours.*
  5. Butter an oven safe bowl or loaf pan. Transfer the dough to the buttered bowl or pan and cover with plastic wrap. Place in a warm place, I set mine on the oven while it preheats, and allow it to rise for 30 more minutes while the oven preheats to 425F. 
  6. After the second rise, bake the bread for 30 minutes. Remove the bread from the oven, invert it onto a wire rack, and allow it to cool or don't and dig in!


Notes

*I will turn my oven on to 350 F for 1 minute, then turn it off again. This creates a warm space for the bread to rise.


Adapted from Alexandra Cooks


Wednesday, August 20, 2014

India-Inspired Rice Pudding

I was planning on experimenting with some Indian Cuisine this weekend. I ran my plans by my roommate, to make sure she was up for Indian food for the weekend, and the only thing she asked was, "Will you make rice pudding?" To which I assured her it would be on the menu.

Neither of us are big on sugar or very creamy dishes, both of which are staples for a traditional rice pudding. A few years ago I experimented with making a rice pudding with an Indian flare, and we have been hooked ever since. This dish has a unique blending of flavors that combine most beautifully to form this great dessert.

India-Inspired Rice Pudding


Prep Time: 0 minutes
Cook Time: 1 hour 10 minutes
Total Time: 1 hour 10 minutes

Serves 6-8

Ingredients: 

  • 2 cups water
  • 1 cup medium-grain rice
  • 1/4 tsp salt (I prefer pink Himalayan sea salt because the flavor is more subtle)
  • 2 14 oz. cans light coconut milk (you can use full-fat for a creamier dessert if you like)
  • 1 1/2 cup almond milk 
  • 1/3 cup sugar or alternative granulated sweetener
  • 1 1/2 tsp vanilla extract
  • 1 tsp ground cardamom
  • 1/4 cup chopped dates (optional)
Instructions:
  1. Bring the water to a boil in a large, heavy-bottomed (preferably non-stick) saucepan. Stir in the rice and salt, cover, and simmer over low heat, stirring once or twice until the water is almost completely absorbed, 15 to 20 minutes. 
  2. Pour in the coconut and almond milk along with the sugar and bring to a simmer over medium-high heat, then reduce the heat to maintain a simmer. Cook, uncovered and stirring frequently, until the mixture begins to thicken, about 30 minutes. Reduce the heat to low and continue to cook for another 15 minutes, stirring every few minutes to prevent the rice from sticking to the bottom or scorching. 
  3. When a spoon can stand up in the pudding, remove from heat and stir in the vanilla and cardamom. If you like a sweeter pudding, add the chopped dates. We prefer this pudding served warm. Store in a Tupperware container and add up to 1 cup of milk, 2 tablespoons at a time, if serving chilled or at room temperature to loosen up the pudding before serving. 


Monday, August 18, 2014

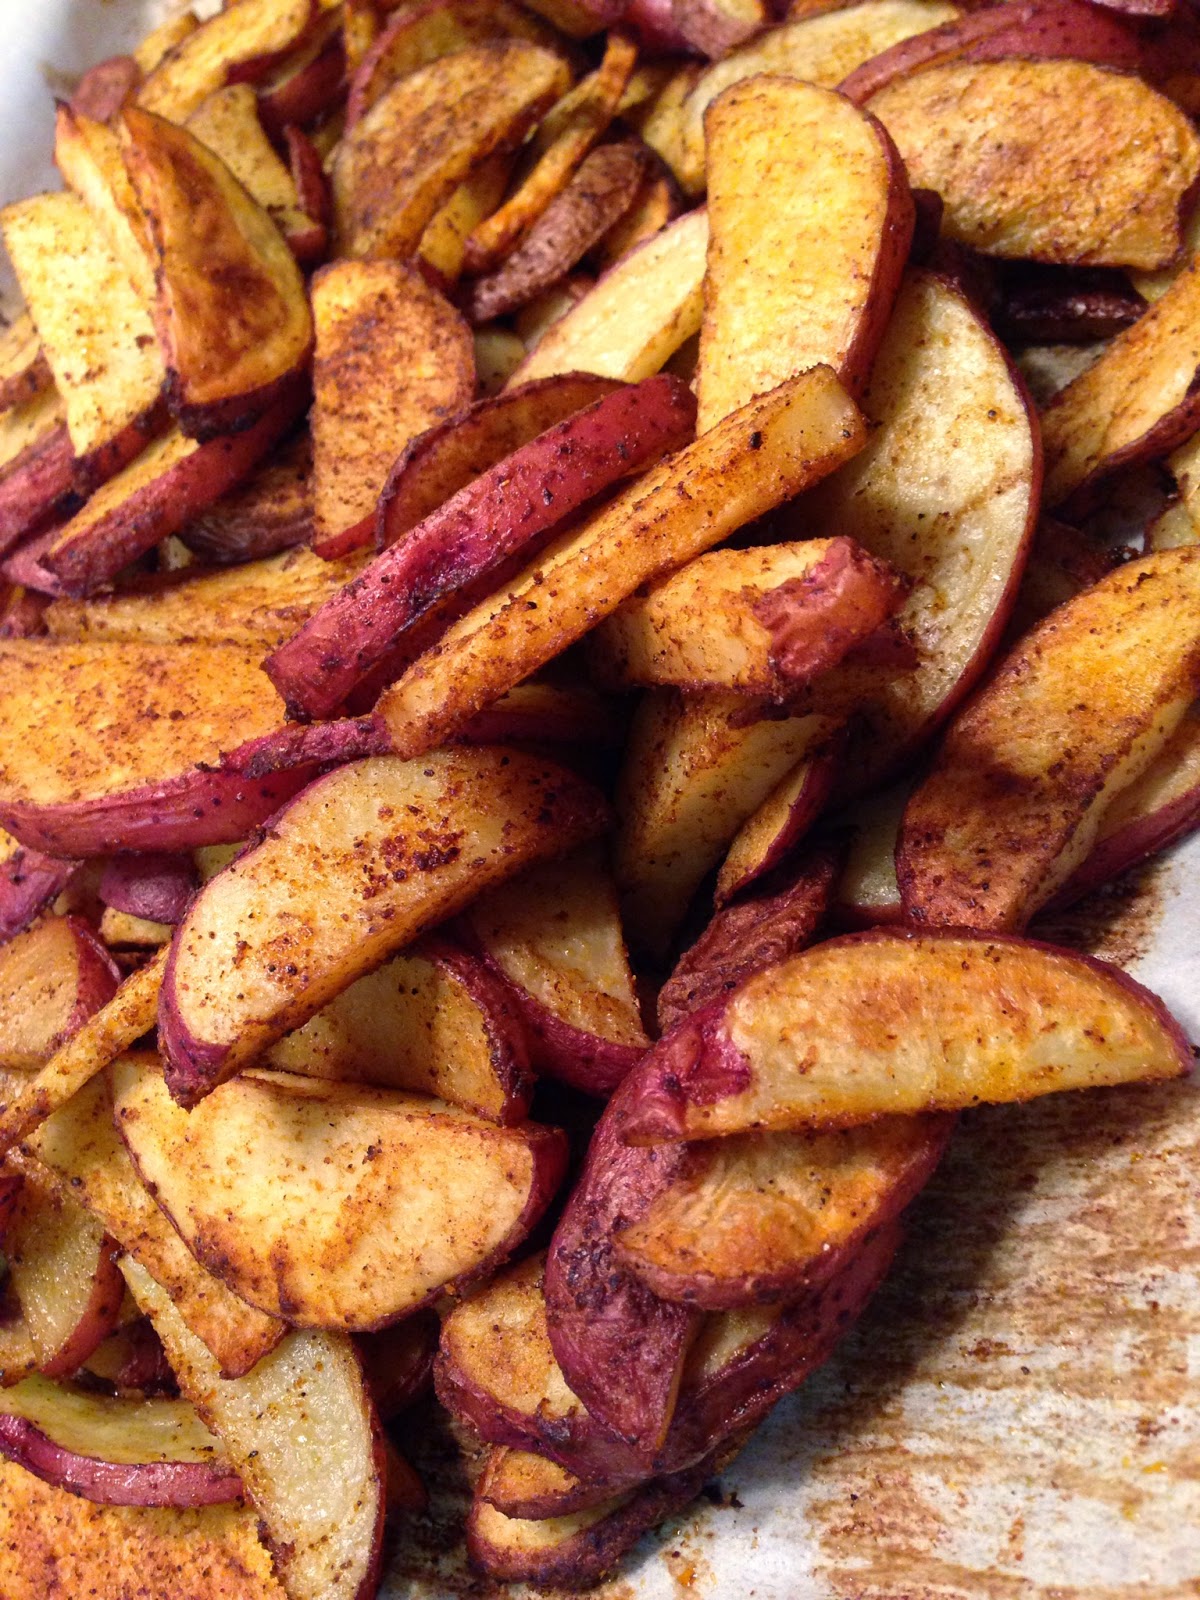
Oven-roasted Curry Potatoes

We are big fans of potatoes in this house. I've said it before and I know I'll say it again. However, I am not a big fan of frying, so we tend to roast our potatoes. We love to experiment with different spices and flavors. When ever we cook Indian food, my roommate requests these potatoes. Now, everyone can enjoy them!

Oven-roasted Curry Potatoes


Prep Time: 15 minutes
Cook Time: 30 minutes
Total Time: 45 minutes

Serves 4


Ingredients:

  • 4-5 medium to large potatoes 
  • 1 tbs olive oil
  • 1/2 tsp salt
  • 1/2 tsp curry powder
  • 1/4 tsp garam masala
  • 1/2 tsp ground cumin
  • 1/4 tsp ground red pepper
Instructions
  1. Preheat the oven to 450 F. Line a large baking sheet with parchment paper.
  2. Cut the potatoes in to hearty strips and let them soak in a bowl of water for 10 minutes.
  3. Drain the potatoes and toss them together with the oil and seasonings.
  4. Spread the potatoes out evenly on the prepared baking sheet and bake for at least 30 minutes. 

Wednesday, August 6, 2014

Summer Squash Thai Coconut Curry

I'm not a big fan of summer squash, but I will eat it. It helps if I make it really flavorful and avoid boiling it at all costs, to prevent it from becoming mushy. When my roommate came home with an entire bag of summer squash, my creative wheels started turning. What I arrived at was this recipe.

Summer Squash Thai Coconut Curry


Prep Time: 15 minutes
Cook Time: 15 minutes
Total Time: 30 minutes

Serves 4


Ingredients:
  • 1 Tbs rice vinegar
  • 3 yellow summer squash, cut into 1/2 inch cubes
  • 2 small bell peppers, sliced thinly
  • 1 Tbs sesame oil
  • 1 Tbs soy sauce (use gluten-free soy sauce to keep gf)
  • 1/2 tsp crushed red pepper
  • 5 cloves garlic, minced
  • 1 (14oz) can light coconut milk
  • juice of 1 lime
  • 5 dried red chillies
  • 10 basil leaves
  • 14 oz rice thick rice noodles
  • 2 Tbs scallions, sliced thinly

Instructions:
  1. In a small bowl, combine the vinegar, squash, bell peppers, sesame oil, soy sauce, pepper, and garlic. Stir to combine and let sit to marinate for 10 minutes. 
  2. While the squash is marinating, heat the coconut milk, lime juice, red chillies, and basil leaves in a stockpot or wok over medium-low heat.  
  3. Boil water in a small stockpot and cook your noodles. 
  4. While noodles are cooking, heat a skillet over medium-high heat until a drop of water sizzles when dropped onto the pan. When the pan is hot, pour in the marinated vegetables and heat until the peppers are a vibrant green, but still crisp, 3-5 minutes. Remove the pan from heat and add the contents to the coconut sauce.
  5. Once your noodles are cooked, drain them and add them to the coconut and vegetable sauce. Top with the scallions.

Sunday, August 3, 2014

Ultimate Cherry Breakfast Smoothie

They say breakfast is the most important meal of the day, so why not make it the most delicious? I love smoothies because they are so fast, nutritious and delicious, and my cherry breakfast smoothie is quite possibly my favorite of all time! This smoothie is chock full of natural anti-inflammatory ingredients, so it's a great choice for either a before or after workout meal.

Ultimate Cherry Breakfast Smoothie

Prep Time: 5 minutes
Cook Time: 0 minutes
Total time: 5 minutes

Yields 1 serving

Ingredients:
  • 1/2 cup tart cherry juice
  • 3/4 cup frozen sweet cherries 
  • 1/2 tsp ginger juice or 1/4 tsp ground ginger
  • 1/2 tsp cinnamon
  • 1 tsp cocoa
  • 2 scoops vanilla protein powder (I use Body by Vi sweet cream)
  • 1/2 cup almond milk
Instructions:
  1. Combine all ingredients in the large cup of a magic bullet or blender. Blend until smooth.

Southern-Style Jambalaya

In the south, we are big on our cuisine. We are proud of our bar-b-que, our sweet tea, mac-n-cheese, etc. One of my favorite southern cuisines is Cajun food! Cajun dishes have such a great variety of seasonings and spices that provide a uniquely southern savory heat. Here, I tried to recreate a cajun staple in my crock pot; jambalaya. My southern friends approved, so here it is.

Southern-Style Jambalaya

Prep Time: 10 minutes
Cook Time: 6 hours
Total Time: 6 hours 10 minutes

Serves 8

Ingredients:
  • 1 cup rice (I used basmati)
  • 1 (10 oz) can original Rotel, if you want more heat use hot
  • 1 (14.5 oz) can diced tomatoes
  • 2 bell peppers, chopped
  • 1 onion, chopped
  • 2 cups okra, sliced into 1" pieces (I used frozen pre-cut okra)
  • 6 cups vegetable broth
  • 5 gloves garlic, minced
  • 1 teaspoon chili powder
  • 1/2 teaspoon cumin
  • 1/4 teaspoon paprika
  • 1/4 teaspoon cayenne pepper 
  • 2 tsp creole seasoning, Tony's or Zataran's
  • 1 lb chicken meat cut into 2" strips (I used breast, but thigh is also delicious)
  • 1 lb shrimp, shelled

Instructions:
  1. In the crock pot, place the rice, Rotel, tomatoes, vegetables, broth, spices, and chicken and stir to combine. Cook on low for 5 hours.
  2. Add the shrimp and cook for an additional hour on low. Serve it up. If prefer more spice, top yours with Chipotle Tabasco sauce for some additional heat.


Thursday, July 31, 2014

Light Loaded Potato Soup

My roommate loves potatoes! In everything. So, we eat potatoes several times a month if not several times a week. We have our favorite staples, but every now and then we like to branch out and try our hand at something new. Both of us were in the mood for soup, so we decided to try a lightened-up version of loaded potato soup, and we very accidentally created this yummy concoction.


Light Loaded Potato Soup


Prep Time: 15 minutes
Cook Time: 30 minutes
Total Time: 45 minutes

Serves 6

Ingredients:
  • 4 medium-large potatoes, peeled and chopped into 1 inch pieces
  • 1 large sweet onion, finely chopped
  • 2 cups vegetable broth*
  • 2 cups almond or goat milk
  • 5-6 oz goat cheese
  • 1 tsp salt
  • 1/2 tsp pepper
  • 2 scallions, thinly sliced
Instructions: 
  1.  In a non-stick stockpot over medium-high heat, add the chopped onion and stir until fragrant and starting to brown, 3 or so minutes. 
  2. Pour in the vegetable broth, and stir to remove any stuck pieces of onion from the bottom of the pan. Add the potatoes and boil over medium-high heat until tender. Add the milk, goat cheese, salt, and pepper and stir to incorporate. 
  3. Remove the soup from the stove and either blend in a food processor or use an immersion blender to blend the soup. Return to medium heat and heat through. 
  4. Top with sliced scallions, and season with salt and pepper, and enjoy. Can be served with crispy bacon and cheddar cheese if you desire.
Notes*
If you do not have vegetable broth (I never bother buying it), then just add the following:
  • 2 cups water
  • 1/2 tsp celery seed
  • 1/4 tsp ground thyme
  • 1/4 tsp  salt
  • 1/4 tsp pepper
  • dash of sage

Wednesday, July 30, 2014

Simple and Healthy Peanut Butter

Have you ever stopped and read the ingredients on a jar of brand-name peanut butter? There are so many oils and other unnecessary products in there! One of my favorite snacks is peanut butter, it closely trails dark chocolate. However, I don't want my peanut "spread" to contain only 60% peanuts. What's the other 40% of my peanut butter comprised of?! I didn't feel like finding out, I just felt like fixing the issue.
Peanut Butter is one of those snacks I could sit down with a spoon and eat half a cup before I realized the damage I had done. Once I started making my own, real, peanut butter, I could only eat a few tablespoons before I was full and satisfied. How's that for real food doing its job to nourish your body and fill you up? It's incredibly simple and much cheaper than store bought butters. Needless to say, I won't be going back to store-bought peanut "spreads"...

Healthy, Real, Peanut Butter


Cook Time: 10 Minutes
Prep Time: 20 Minutes
Total Time: 30 Minutes

Makes about 1.5 cups of Peanut Butter

Ingredients:
  • 1 16oz bag of raw blanched peanuts
  • 4 Tbs Honey (or maple syrup for vegan option)
  • 1 tsp salt (I use Himalayan pink sea salt)
Instructions: 
  1.  Preheat the oven to 350 F. While the oven is preheating, spread the peanuts out on a baking sheet. Once oven has heated up, place the sheet of peanuts in the oven and roast until they start to turn light brown, approximately 15 minutes. Remove once they start to turn brown, because they will continue to cook once they are removed from the oven. 
  2. Allow the peanuts to cool for 10 minutes. Once the peanuts have cooled, place them in a food processor and process until they form a grainy flour. Scrape down the sides of the bowl. Add the salt and the honey and continue to process until smooth butter is formed. The amount of time this will take will vary based on the food processor, approximately 10 minutes. 
  3. Store peanut butter in a Tupperware container in the fridge. The oils in this butter will not separate like store-bought "Natural" Peanut Butter.