Sunday, November 23, 2014

Banana Nut Muffins

All desserts are a yes in my book. My roommate however prefers baked breakfast goods, muffins in particular. Some how it took me nearly 4 years to figure this out, but now that this is an established fact, muffins make regular appearances in our breakfast rotation. One of her favorites is banana nut muffins. Once they are baked, they are devoured. She will start eating them as soon as they are out of the oven and snack on them until they are gone.

I like to make a full dozen regular sized and a full dozen mini, to satisfy your appetite for breakfast or just a small snack. I've made several loaves of banana bread and finally mixed together a few elements from my favorite recipes to develop these muffins.

Banana Nut Muffins


Prep Time: 10 minutes
Cook Time: 30 minutes
Total Time: 40 minutes


Yields 18 regular muffins


Ingredients:
  • 2 cups oat flour (gluten free)
  • 1 tsp baking soda
  • 1/2 tsp baking powder
  • 1/4 tsp salt
  • 1/2 tsp ground cinnamon
  • 1/2 cup butter (1 stick), softened, or apple sauce
  • 3/4 cup light brown sugar
  • 2 eggs
  • 1 tsp vanilla extract
  • 3 tbs triple sec or liquor of your choice
  • 4-5 ripe bananas, broken in to 2 inch sized pieces
  • 1/2 cup nuts of choice (optional), I love walnuts or pecans in this recipe

Instructions:
  1. Preheat the oven to 350F, and line a cupcake tin (either full-sized or mini) with liners. 
  2. Combine the four, baking soda, baking powder, salt and cinnamon in a bowl and set aside. 
  3. In a food processor (or you can use a mixer, it just takes a bit more time) process the butter and brown sugar until light and fluffy, 2-3 minutes, scraping down the bowl as needed. With the machine running, add the liquor and vanilla extract through the feed tube. 
  4. Add the eggs and pulse to combine. Do not overly process the eggs or your muffins will be dense and tough. Add the bananas and process until combined and liquified. 
  5. Scraped down the bowl and sprinkle the flour mixture over the banana mixture. Pulse until combined. Add in the nuts and pulse once or twice to combine. 
  6. Fill prepared tins 2/3 to 3/4 full. If using a full sized tin bake for 27-30 minutes. If using a miniature tin, bake for 15-17 minutes. The muffins will be done when a toothpick inserted into the center comes out clean, but the muffins are still glossy, not dry in appearance.

Wednesday, November 5, 2014

Halupki (Stuffed Cabbage)

Stuffed cabbage is a traditional Slovak food. It is always a Fall/Winter staple in my family. You can use just about anything for a filling. I either opt for beef and rice or vegetables and rice depending on my intended audience. You can prepare it in the oven or in a crockpot, and it is delicious no matter how it is prepared.


Halupki (Stuffed Cabbage)


Prep Time: 20 minutes
Cook Time: varies
Total Time: varies


Serves 4-8

Ingredients:

Meat Filling:
  • 1 head of cabbage, 4-10 large outer leaves washed, and rib removed
  • 1 cup rice, cooked (any kind will do)
  • 1 lb beef
  • 1/2 tsp salt
  • 1/2 tsp pepper
  • 1 tsp Italian seasoning
Vegetable Filling:
  • 1 head of cabbage, 4-10 large outer leaves washed, and rib removed
  • 1 cup rice, cooked (any kind will do)
  • 3 cups of any combination of chopped vegetables
    • zucchini
    • mushrooms
    • bell peppers
    • carrots
    • etc.
  • 1/2 tsp salt
  • 1/2 tsp pepper
  • 1 tsp Italian seasoning
Tomato Sauce:
  • 2 14 oz. cans diced tomatoes
  • 1 14 oz. can crushed tomatoes
  • 1 16 oz. jar roasted red peppers
  • 3 cloves garlic, peeled
  • salt and pepper to taste

Instructions:
  1. Boil a stockpot of salted water. Submerge the prepared cabbage leaves in the water and boil until they are bright green and fold easily, 5-8 minutes.
  2. Remove the cabbage leaves with tongs and set them aside to cool.
  3. Combine the rice, seasonings, and meat or vegetable filling in a large bowl. Scoop 1/2 to 2/3 cup filling into the inside of a cabbage leaf. Tuck the bottom of the leaf up and over the filling. Fold the sides of the leaf over the filling, then continue to roll the bottom of the leaf up to the top. Set the rolled cabbage leaf, seam side down, in either a glass Pyrex dish (if you are baking them) or in a crockpot. Repeat with the remaining leaves. If you have any leftover filling, you can add it to the tomato sauce.  
  4. In a food processor or blender, combine the diced tomatoes, crushed tomatoes, peppers, garlic cloves, and salt and pepper and process until smooth.
  5. Pour the sauce over the rolled cabbage leaves. Cover with aluminum foil and bake at 375 F for 2 hours or cook in the crockpot on low for 8 hours or high for 6.


The Best Gluten-Free Peanut Butter Cookies

Peanut butter is just one of those foods for me. I can go months without any of it, and then suddenly I need to eat an entire jar to feel satisfied. I don't know what makes it so addictive, but I love it! I was in one of my massive peanut butter consumption phases when my coworker mentioned how much she wanted peanut butter cookies. Why hadn't I thought of that!? Yum! So I got to work.

I reviewed several recipes for peanut butter cookies. I checked the ingredients and was amazed at how much sugar went in to them. I was not a fan. In addition, several of the cookies looked dry and crumbly. Although I enjoy a cookie with a good crumb, these looked brittle, hardly what I wanted for my cookies. I tried several recipes including your basic sugar, egg, peanut butter, cookies, but I didn't care for them. They were overly sweet and not very dynamic. I finally came across a gluten free cookie that was incredible, It did not have the height I was looking for, but the outside was crisp, the inside was chewy, they could bend without breaking into a million little crumbs and they were addictive. Best of all, they were not laden with 2 cups of sugar! Could this be real? It certainly was.

So as not to put too much stock in my own opinion, I made sure to have others try the various cookies I had baked. My roommate, my coworkers, my workout buddies...they all agreed that these were the best cookies hands down.

I used Chelsea's Messy Apron's recipe. I didn't even make any changes, it was that good! So I have re-blogged it, if you will. Thank you Chelsea for this delicious gem!

The Best Gluten -Free Peanut Butter Cookies


Prep Time: 10 minutes
Cook Time: 7 minutes
Total Time: 17 minutes

Ingredients:
  • 1 cup creamy peanut butter
  • 2 tablespoons honey
  • 4 tablespoons light brown sugar
  • 1/2 cup old-fashioned oats
  • 1/8 teaspoon salt
  • 1 teaspoon baking soda
  • 1/4 teaspoon baking powder
  • 1/2 teaspoon vanilla extract
  • 1 large egg
  • 1/2 cup peanut butter chips + chocolate chips, or nuts, heath bits, etc.
 
Instructions:
  1. Preheat the oven to 350 degrees F.
  2. In a medium sized bowl stir together the peanut butter, honey, and brown sugar. Do NOT warm up the peanut butter or the honey.
  3. Add in the oats, salt, baking soda, baking powder, and vanilla extract. Stir well.
  4. In a separate bowl lightly beat the egg and then add it to the mixture.
  5. Stir in desired add-ins.
  6. The mixture will be thick and hard to stir. Continue stirring until combined and then use a cookie scoop to scoop out the dough. Press the dough very tightly in the cookie scoop to form the balls. Without a cookie scoop these tend to crumble.
  7. If not using a cookie scoop you will have to work with the dough a little bit more by squeezing it into a ball.
  8. Form the small balls onto a cookie sheet and bake for 5-7 minutes.
  9. Watch the cookies closely and remove when the bottom barely starts to brown even if they don't look completely done (they cook more as they cool). I burned a few cookies by not watching them - they look underdone and 30-60 seconds later they are burned! (TIP: I also found cooking smaller batches - like 6 on a tray worked the best)
  10. Remove and allow to cool completely.


Vegan Chocolate Silk Pie Bites

My roommate has a chocolate silk pie recipe that has literally been passed down for generations and it is unreal, but it also unfortunately has dairy in it. I attempted to make a suitable substitute (can't quite call it a replacement) by combining nuts and chocolate. It was a simple enough idea, but the final result was more like a truffle bite than a chocolate pie. They are rich and incredibly decadent, but they sure are good.

Vegan Chocolate Silk Pie Bites


Prep Time: 15 minutes
Cook Time: 0 minutes
Total Time: 15 minutes

Ingredients:
  • 12 oz vegan chocolate chips, melted
  • 2 cups cashews, soaked in hot water
Instructions:
  1. Line a mini muffin tin with liners. In a food processor, process the cashews until they form a thick cream. With the machine running, add the melted chocolate chips. Scrape down the bowl and process until combined. Scoop small amounts into each of the prepared cupcake liners. Allow the bites to set in the fridge or freezer for at least 30 minutes. They can be eaten frozen, although they are great at room temperature as well. Store any leftovers in the freezer.


Saturday, October 18, 2014

Almond Cardamom Waffles

Still in pursuit of delicious and different breakfast options, I was toying with a few different breakfast ideas when I came across a recipe for Perfect Vanilla Waffles. Although they looked delicious, I didn't have a few of the ingredients on hand...so....I improvised. I also felt that I had been overloaded by cinnamon, being October and all, so I picked another route to follow and combined almond and cardamom. Yum! 


Almond Cardamom Waffles

I put chocolate chips in mine. Yummy chocolate middle!


Prep Time: 45 minutes
Cook Time: 15 minutes
Total Time: 1 hour


Ingredients: 
  • 1 cup almond milk, lukewarm
  • 2 tsp honey or agave
  • 2 tsp rapid rise yeast
  • 1 cup gluten free flour
  • 1 tsp baking powder
  • 1 tbs tapioca starch
  • pinch of salt
  • 1 tsp ground cardamom
  • 1 tbs almond extract
  • 2 tbs oil


Instructions:
  1. Dissolve the honey or sweetener in the lukewarm milk. Sprinkle the yeast over the top of the mixture and set aside for at least 10 minutes. 
  2. In a large mixing bowl, mix together the flour, starch, salt and cardamom. Add the almond extract and oil and whisk until the dough forms small granules. 
  3. Pour in the milk mixture and mix until just combined. Once everything has been mixed, set the batter aside for at least 20-30 minutes.
  4. Once your waffle iron is ready, spray it with cooking spray and pour on the batter. Cook until your waffles are a deep golden brown. Feel free to mix up the spices or add mini chocolate chips, nuts or dried fruit!


Monday, September 29, 2014

The Best Mediterranean Potato Salad of All Time

Moment of truth, I do not care for mayonnaise. It is not a favorite condiment of mine. That being said I also don't care for casseroles. Many of them taste fine, it's more the mystery of what they contain that deters me from digging in. They vary in density, consistency, and many other features, making them all in all far too variable for me to enjoy. I feel so much better for having gotten that off my chest. Now we can move forward.

For the longest time, I did not eat potato, egg, or chicken salad, because of their casserole-like qualities and the copious amounts of mayonnaise often used in their preparation. However, I now eat potato salad, and it is vegan, it is healthy, and it is mayonnaise free!

This potato salad is mustard-based, seasoned with fresh mint, parsley, salt and freshly-ground black pepper. It has a great consistency, and all of the ingredients are clearly identifiable.

Mediterranean Potato Salad


Prep Time: 15 minutes
Cook Time: 20 minutes
Total Time: 35 minutes

Serves 4 to 6


Ingredients: 
  • 4-5 medium red-skinned potatoes, rinsed, drained and cut into 1 inch cubes
  • 1 cup green beans, cut into 2 inch long pieces and steamed until crisp and bright green*
  • 1 can chickpeas, rinsed and drained
  • 1/2 cup fresh parsley, chopped
  • 1/2 cup fresh mint, chopped
  • 2 tbs sliced marinated olives, I use kalamata
  • 1 tbs capers, rinsed and chopped 
  • 2 tbs olive oil
  • 2 tbs balsamic vinegar
  • 2 tbs whole grain mustard
  • 1 tsp salt
  • 1/2 tsp ground black pepper


Instructions:
  1. Boil water in a large heavy bottom stock pot over medium-high heat. Once the water is boiling, add your potatoes. Boil them until they are easily pierced by a knife, but are still firm, 10-15 minutes. Drain your potatoes in a colander and let them cool while you prepare the dressing. Do not run cold water over them to expedite this process. 
  2. While your potatoes are cooking, combine the olive oil, vinegar, mustard, salt and pepper in a small bowl and set aside. 
  3. Return the potatoes to the pot or to a serving dish. Add the green beans, chickpeas, parsley, mint, olives, and capers and toss to combine. Drizzle the oil and vinegar dressing over the contents of the bowl and toss until everything is lightly coated with dressing. You can serve this salad warm or chilled. 
Notes*
If you like your green beans to be very crisp, then you can cut them and place them in the bottom of the colander. When you drain your potatoes, pour the hot water over the green beans. Once the potatoes have cooled slightly, return the green beans and the potatoes to the pot and proceed with the recipe. 

Adapted from Williams Sonoma

Fail Proof Kale Chips

I have read a lot of horror stories starring burned kale chips as the main villain. In an attempt to remedy this situation (and finish off a half a bunch of kale), I got to work in my kitchen.

My roommate had opened the fridge door, only to exclaim, "we still have a lot of kale left over. You should make kale chips." Sometimes, she can be so convincing, and with a suggestion like that, I couldn't find any reason not to. I had read of several different methods using the oven, but several methods had resulted in burnt chips. I tried a slightly different method, and I was very pleased with the results.

Fail Proof Kale Chips


Prep Time: 10 minutes
Cook Time: 1 hour
Total Time: 1 hour and 10 minutes

Ingredients:
  • 1/2 bunch of kale, rinsed, dried, and cut in to 2 inch pieces
  • 2-3 tbs olive oil
  • Salt, pepper, or any of your favorite seasonings
Instructions:
  1. Preheat your oven to 425 F and line a baking sheet or two with parchment paper. After preparing your kale, toss it in a large bowl with the olive oil and sprinkle it with the seasonings of your choice, making sure that the kale is evenly coated. 
  2. Spread out your kale pieces so that they are not overlapping each other. You may need multiple baking sheets. Place your pan in the oven, and turn the oven off. Leave the pan in the oven for 20 minutes. 
  3. If you dried your kale very well, then your chips may be done after the 20 minutes, however, if they do not hold their shape just yet, then leave the pan in the oven and let your oven preheat to 425 F once more. Once the oven has preheated, turn the oven off again and leave the chips in for another 10 to 20 minutes, checking periodically to ensure that they don't burn.

Sunday, September 28, 2014

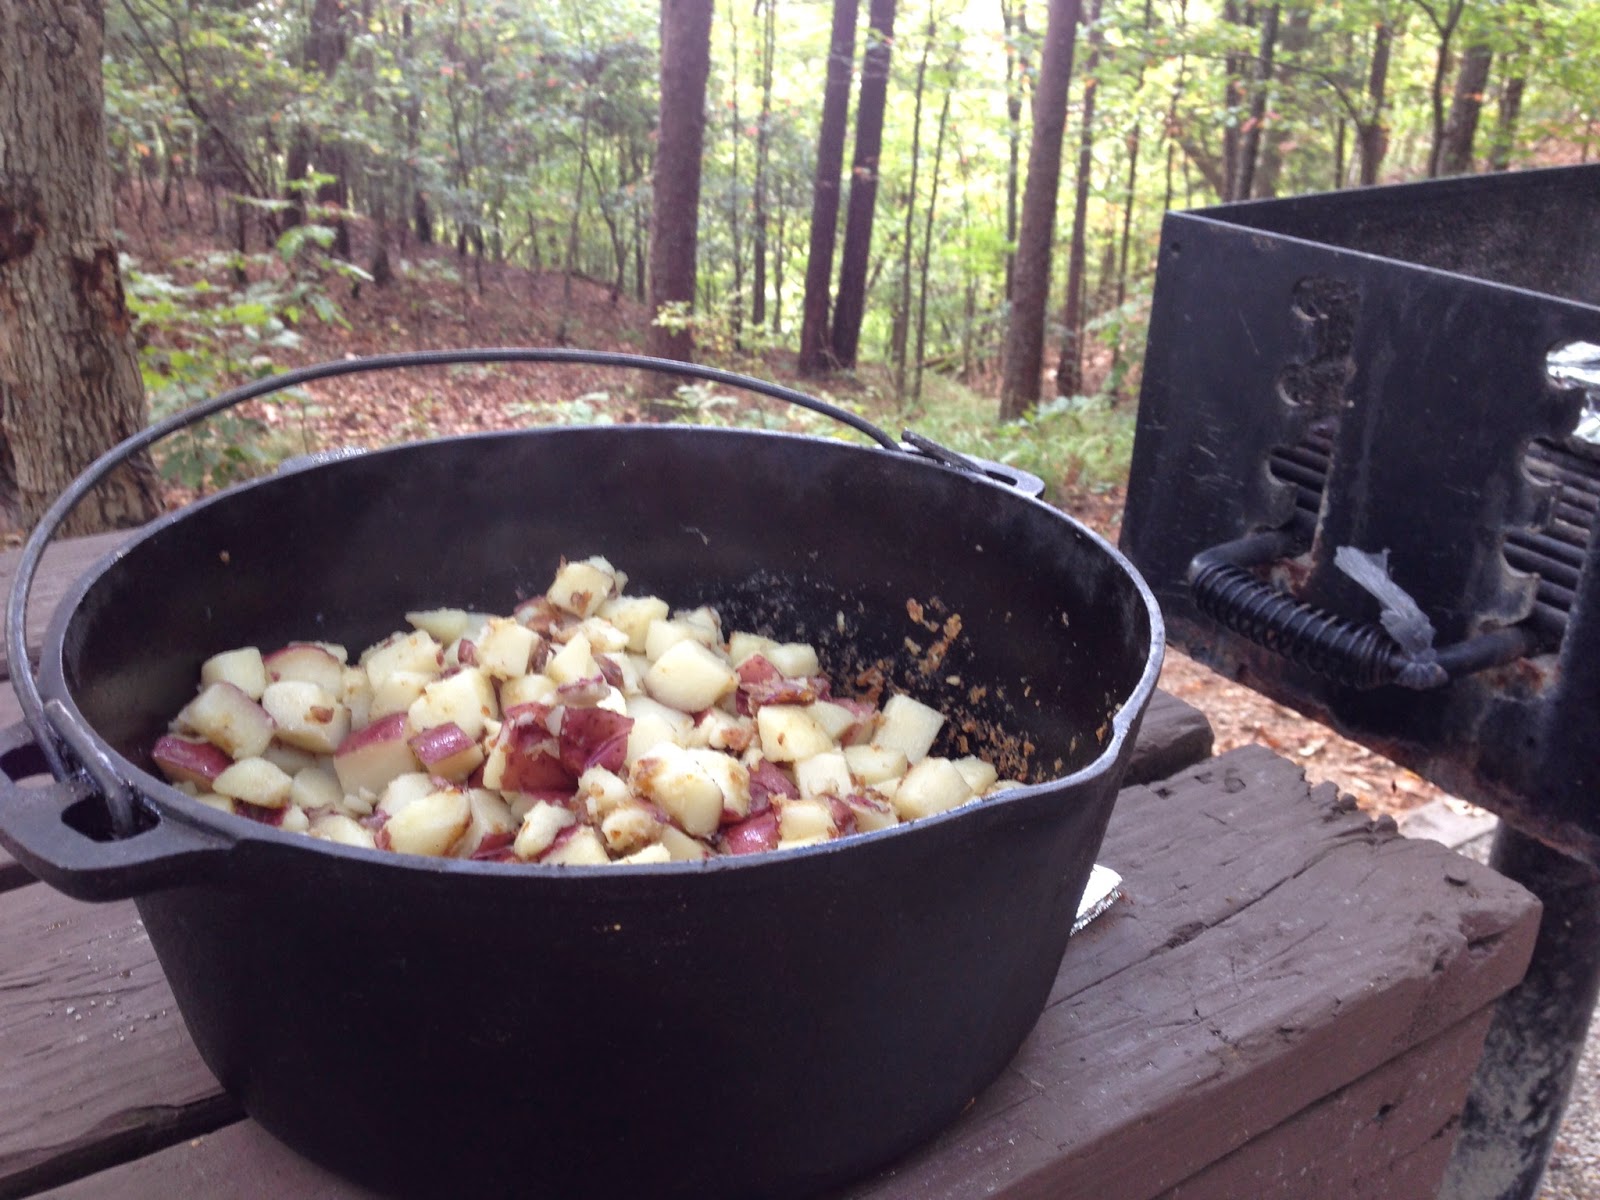
Dutch Oven Campfire Potatoes

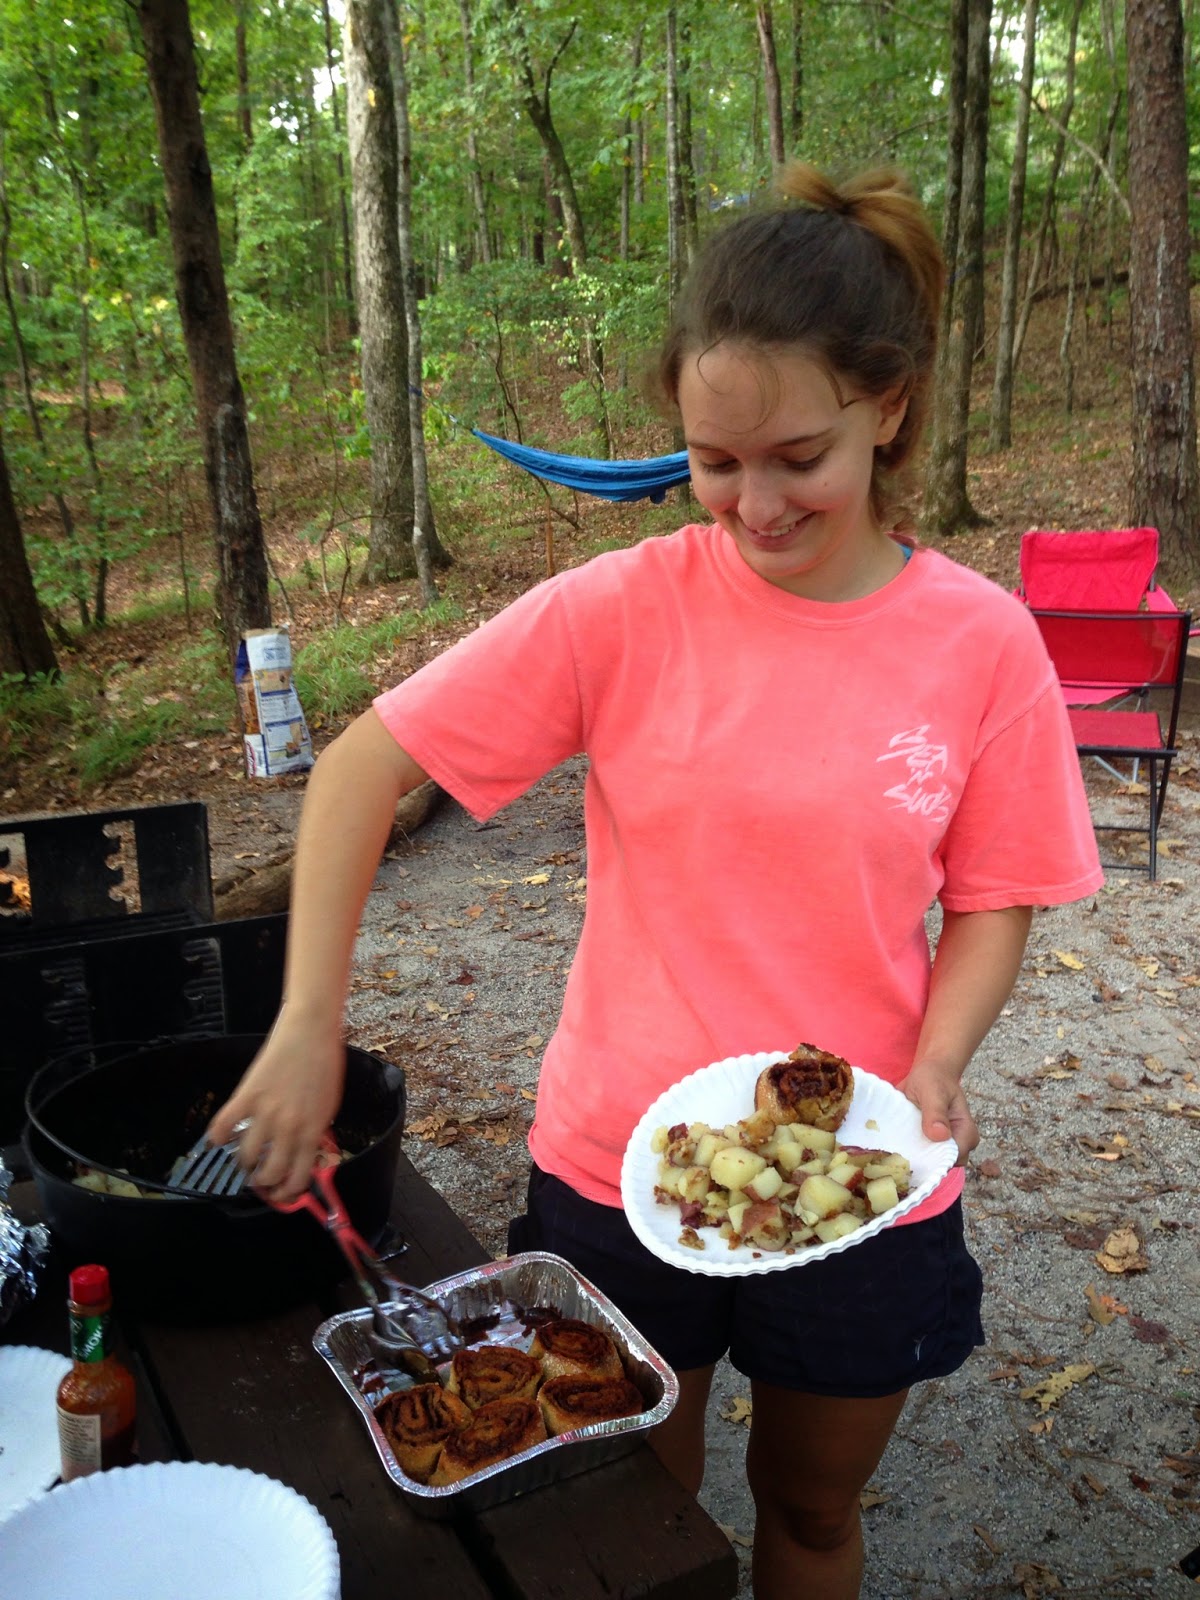
This weekend, a group of friends and I went camping at a local park. We divided the tasks very well among us and we all pulled our own weight. It was a great trip! That being said, I was in charge of food prep and cooking. Trying to keep this trip as healthy and simple as possible, I only brought one pan and prepared a lot of food in advance. We had pumpkin loaf, potato salad, fresh watermelon, celery sticks, and roasted potatoes to name just a few of the items on our menu.

We brought a 5lb bag of potatoes and a mini bottle of olive oil. Cutting, rinsing, and roasting the potatoes was a great way to start the day as my buddies woke up. We shared Irish coffee as the potatoes cooked and dug into the potatoes and some cinnamon buns I had baked in advance.

This breakfast was a great way to start our weekend of outdoor adventure. It was great to disconnect from the Internet and our phones, and just enjoy each others company. I highly recommend it. 


Dutch Oven Campfire Potatoes


Prep Time: 10 minutes
Cook Time: 40 minutes
Total Time: 50 minutes

Serves 6


Ingredients:
  • 5lb bag of potatoes, cut into 1/2 inch cubes and rinsed
  • 1/2 cup olive oil
  • Salt, pepper, and seasonings or toppings of your choice

Instructions:
  1. Start a chimney with your coals, or the cooking apparatus you are using. While the coals are heating, place your potatoes in a Dutch oven or fire proof pan and toss them with olive oil and seasonings. When the coals are glowing and red hot, pour them into your grill or fire pit, lower the grate to the lowest setting above the coals, and place the Dutch oven on the grate. 
  2. Let the potatoes roast over the coals, stirring every 5 minutes or so. Make sure to scrape any potatoes from the bottom of the pan so they don't burn. Cook the potatoes until they are easily pierced by a fork, at least 30 minutes. 
  3. Carefully remove the potatoes from the grill and serve them while they are still warm. We topped ours with Chipotle Tabasco sauce and they were great!


Pumpkin Gingerbread Cake with Pecan Streusel Base

I am a huge fan of Fall foods. Having grown up in the north, I am of the mindset that food, like produce, has its own season. Some of my favorites are greens (collard, mustard, kale, etc.), root vegetables, apples in any form, and copious amounts of pumpkin. What are some of your favorite fall flavors or foods? I'm always looking to try new foods! Since we have just officially started Fall, I can now eat the above foods to my heart's content!!!

I had a can of pure pumpkin that I needed to use, so I started tossing ingredients together in a bowl, and I was really pleased with the final result. This is surprisingly versatile too. If you would rather have a pumpkin gingerbread loaf, then omit the streusel base in the pan and bake just a few more minutes. This recipe is great by itself or topped with a dollop of spiced cashew cream or even a little apple butter.

Omitting the streusel base, cuts out sugar, but it does not take away from the final product. With or without added brown sugar, this recipe is fabulous and sure to be a new Fall staple.

Pumpkin Gingerbread Cake with Pecan Streusel Base


Prep Time: 15 minutes
Cook Time: 45 minutes - 1 hour
Total Time: 1 hour - 1 hour 15 minutes

Yields 24 pieces

Ingredients:

Cake:

  • 1/2 cup molasses
  • 1/2 cup maple syrup
  • 1 15 oz. can 100% pure pumpkin
  • 4 flax eggs (4 tbs ground flax and 8 tbs water)
  • 1 cup white rice flour
  • 1/3 cup buckwheat flour
  • 3 tbs tapioca starch
  • 1 tsp salt
  • 1 tbs ground cinnamon
  • 1/2 tsp ground ginger
  • 1/4 tsp ground nutmeg
  • 1 tsp baking soda
  • 1/2 tsp baking powder
Streusel Base (Optional)
  • 1/4 cup brown sugar
  • ground cinnamon
  • 1/4 cup chopped pecans
Instructions:
  1. Preheat the oven to 350 F and line two 9x9 square baking pans or a 9x13 cake pan with parchment paper. If you are using the streusel base, then sprinkle 2 tbs brown sugar into the bottom of each lined pan. Sprinkle cinnamon evenly over the brown sugar, then sprinkle 2 tbs of the pecans over the cinnamon in each pan. In a measuring cup, whisk together the flax and water to form your flax eggs and let them set while you mix the cake together. 
  2. In a large mixing bowl, combine the molasses, maple syrup, and pumpkin. In a separate bowl, combine the flours, starch, salt, spices, baking soda and baking powder. 
  3. Add the flax eggs to the pumpkin mixture and whisk to combine. Add the dry ingredients to the wet ingredients and whisk until just combined. 
  4. Divide the batter between the two pans, and bake until a toothpick inserted in the center comes out clean, 45 minutes to 1 hour. Remove the pans from the oven and allow them to cool slightly before serving. You can serve the cake warm directly from the pan or cool completely and invert if you want to remove the cake from the pan. 

Thursday, September 25, 2014

Big Sky Bakery Inspired Bread

There's a bakery in Birmingham that bakes a delicious 7 seed bread. Unfortunately, it contains wheat flour and I can no longer eat it. The bread is a moist and sweet brown loaf studded with seeds throughout and rolled in sunflower seeds. I loved it, and I missed it...until I came across this recipe.

The flavor of this bread is so similar to Big Sky Bread and makes for a great breakfast or snack. It's incredibly hearty and filling and loaded with healthy seeds and nuts!


Big Sky Bakery Inspired Bread


Prep Time: 2 hours
Cook Time: 50 minutes
Total Time: 2 hours 50 minutes

Yields 1 loaf


Ingredients:
  • 1 cup raw sunflower seeds, you can use seasoned ones if you want a different flavor
  • 1/2 cup flax seeds
  • 1/2 cup raw almonds or other nuts
  • 1 1/2 cup gluten free old fashioned rolled oats
  • 2 tbs. chia seeds
  • 3 tbs psyllium seed husk powder
  • 1 tsp fine grain pink Himalayan sea salt
  • 1 tsp ground cinnamon (optional)
  • 1/2 cup dried cranberries or other fruit (optional)
  • 1 tbs maple syrup
  • 1/4 cup apple sauce
  • 1 1/2 cups water
Instructions:
  1. Line a loaf pan with parchment paper and set aside. In a large bowl mix the sunflower seeds, flax seeds, almonds, oats, chia seeds, psyllium, salt, and cinnamon and cranberries if using. 
  2. In a measuring cup, mix together the maple syrup, apple sauce and water. Pour the mixture over the dry ingredients and mix until a thick dough forms. 
  3. Transfer the dough to the prepared loaf pan and smooth out the top of the loaf. Let the loaf rest for at least 2 hours and up to overnight on the counter. The dough is ready to be baked when you can tug at the side of the parchment paper and the dough retains its shape. 
  4. Heat the oven to 350 F. Bake the loaf on the middle rack for 20 minutes. Remove the loaf from the pan and place it upside down on the oven rack. Bake for an additional 30 to 40 minutes. The bread is done when it sounds hollow when tapped. 
  5. Let the bread cool completely before slicing. This bread should be stored in an airtight container in the fridge for a week or for three weeks frozen. Slice before freezing.


Adapted from My New Roots

Wednesday, September 24, 2014

Sautéed Kale in a Balsamic Apricot Vinaigrette

It's fall, which means a surplus of leafy greens at the grocery store. As I was stocking up for the week, I passed by the collards, but kale caught my eye. I brought it home and started toying with flavor combinations. I think I may be on to something here...This recipe has touches of spicy and sweet and is light but very filling. All in all, it's delicious! 


Sautéed Kale in a Balsamic Apricot Vinaigrette

Prep Time: 10 minutes
Cook Time: 10 minutes
Total Time: 20 minutes

Serves 4


Ingredients:
  • 2 tbs olive oil
  • 1 small yellow onion, sliced thinly
  • 6 cloves garlic, minced
  • 1/2 cup dried cranberries
  • 1 tbs apricot preserves
  • juice of 1 lemon
  • 4 cups of kale, sliced thinly and rinsed
  • 1/4 cup slivered almonds
Instructions:
  1. Heat the oil in a large skillet over medium-high heat. Add the onion and cook until starting to brown, at least 5 minutes. Add the garlic and cook at least 1 minute. Add cranberries, apricot preserves, and lemon juice and stir until heated through, 1 minute.
  2. Add the kale to the pan, turn off the heat, and toss to combine. Remove the pan from the heat when the kale starts to wilt. Toss once more before serving. 

Saturday, September 13, 2014

"Semi-Alfredo" Pasta Caprese

I have been eating pasta caprese for years now. I have also always loved Alfredo sauce, although it does not love me in return (lactose intolerant). Having been turned on to almond milk, and loving the way it cooks pasta, I decided to give classic Alfredo sauce a modern makeover while simultaneously pairing it with my favorite tomato sauce.

Sometimes fusions work very well, and sometimes they don't. I am happy to say this was one of those times that the heavens were aligned in favor of a glorious marriage between two classic Italian dishes.

By cutting out the rich creams traditionally used in preparing Alfredo sauce, I was able to rekindle an old passion, this time I felt love in return.


"Semi-Alfredo" Pasta Caprese


Prep Time: 15 minutes
Cook Time: 15 minutes
Total Time: 30 minuts

Serves 4 to 6


Ingredients:
  • 1/4 cup olive oil
  • 1-2 tbs lemon juice
  • 2 cloves garlic, miced
  • kosher salt and pepper to taste
  • 3-4 ripe tomatoes, diced into 1/2 inch pieces
  • 1/4 cup fresh basil, chopped
  • 1 (14 oz) package of XL wide rice noodles (you can use rice shells, fusilli, etc. or normal wheat pasta if you are not gluten free)
  • 4 cups almond milk
Instructions:
  1. In a small bowl, combine the olive oil, lemon juice, garlic, salt, pepper, tomatoes and basil and set aside to marinate at least 15 minutes. Do not let the tomatoes marinate for  more than 30 minutes. 
  2. In a large saucepan, bring the almond milk to a boil over high heat. Add the pasta, reduce heat to medium, and simmer until the pasta is cooked through and most of the liquid has been absorbed or cooked out. 
  3. Without draining the pasta, add the marinated tomatoes to the pasta and stir to combine. Serve warm.

Gluten Free Chocolate Chip Cookies

I've come across several gluten-free/vegan dessert options that incorporate beans of all types, and I've recreated several of those recipes. For the most part, I am not a fan. It's a difficult task to balance health and sweet delectable chocolatey desserts. This recipe is one of those recipes that I tried and actually liked. Actually, I loved it. I've made some changes and some variations and they've all been great!

My vegan sister and brother-in-law love them. In fact, if I plan a visit home, my brother-in-law  asks whether I have time to bake some cookies or not and I'm more than happy to oblige! Food is one of my love languages, and it makes me so happy to sit around the kitchen table with my family sharing a dozen cookies between us. As we savor the cookies, we recant old stories and new ones. Forming memories, one bite at a time.

Gluten Free Chocolate Chip Cookies


Prep Time: 10 minutes
Cook Time: 10 minutes
Total Time: 20 minutes

Yields 18 cookies


Ingredients:
  • 1 14.5 oz can of chickpeas
  • 1/2 cup plus 1/8 cup PB2 powder or equivalent amount of nut butter
  • 1/4 cup water or almond milk (only if you use the PB2 powder)
  • 1/4 cup maple syrup (or 1/4 cup honey)
  • 2 tsp vanilla extract
  • 1 tsp baking powder
  • 3/4 cup chocolate chips (substitute vegan or carob chips if desired)
Instructions:
  1. Preheat the oven to 350 F and line two baking sheets with parchment paper. In a food processor, process the chickpeas until they form a grainy paste. Add the PB2 powder, water (if using), sweetener, vanilla, and baking soda, and process until smooth. Stir in the chocolate chips*. 
  2. Roll the dough into golf ball sized pieces and arrange on the cookie sheets. If you prefer your cookies to be more disc-like, then flatten the balls slightly on the sheet, if not, then they will cook into small mounds. Bake for 10 minutes or until cookies retain their shape but are still soft when you press on them.
Notes*
If you add the chocolate chips to the food processor and pulse to incorporate them, then your cookies will have chocolatey fudge swirls in them. Yum! 


Ancient Grain Breakfast Porridge

I've lived in the north and in the south for extended periods of time. I've found that northerners and southerners are quite proud of their breakfast options, and quite loyal to them. Up north, we ate porridge, or cream of wheat/rice etc. In the south, you will almost certainly find grits, bacon and biscuits on the breakfast table. I've been fortunate enough to develop a taste for porridge and grits, so I don't feel at odds at anyone's breakfast table, but every now and then I like to branch out and try a new take on an old classic.

I've found myself experimenting with several new grains lately. I didn't even know what quinoa was 3 years ago, and now I don't remember life without it. Breakfast is said to be the most important meal, so why not pack in the healthy grains early on in your day?

Unlike instant breakfast porridge, or most cereals for that matter, this recipe is not loaded with sugar and preservatives and is delicious by itself or with fresh or dried fruit, or a spoonful of apricot preserves.

Ancient Grain Breakfast Porridge


Prep Time: 0 minutes
Cook Time: 20 minutes
Total Time: 20 minutes

Yields 1 serving


Ingredients:
  • 2 tbs quinoa, rinsed
  • 2 tbs amaranth
  • 2 tbs polenta
  • 1 1/2 cup water or almond milk
  • Any toppings you desire, fruit, jam, nuts, etc. 
Instructions: 
  1. In a small saucepan, combine the quinoa, amaranth, polenta, and water or milk. Bring to a boil, then reduce the heat to medium-low and simmer, stirring occasionally,  for 15-20 minutes, until the liquid has been absorbed and the grains are tender. 
  2. Transfer to a bowl and top with your desired toppings.


I swirled in some pistachios and a dollop of apricot preserves

Chocolate Chip Cherry Almond Cookies

I was talking to a group of guys about computers earlier today, and the role that cookies play on the internet...Okay, if you know me, then you know the route my mind took. It was a lazy rainy afternoon, and there were no baked goods in my house, so I started formulating a plan to spice up my classic gluten free chocolate chip cookie recipe.

I decided to change up the flavors and incorporate a favorite flavor pairing of mine, cherry-almond. They were so good, I barely had time to snap a picture before they were gobbled up.

Chocolate Chip Cherry Almond Cookies


Prep Time: 10 minutes
Cook Time: 10 minutes
Total Time: 20 minutes

Yields 18 cookies

Ingredients:
  • 1 14.5 oz can of chickpeas
  • 1/2 cup plus 1/8 cup PB2 powder or equivalent amount of nut butter
  • 1/4 cup water or almond milk (only if you use the PB2 powder)
  • 1/4 cup maple syrup (or honey)
  • 2 1/2 tsp almond extract
  • 1 tsp baking powder
  • 3/4 cup chocolate chips (substitute vegan or carob chips if desired)
  • 1/2 cup dried cherries
Instructions:
  1. Preheat the oven to 350 F and line two baking sheets with parchment paper. In a food processor, process the chickpeas until they form a grainy paste. Add the PB2 powder, water (if using), sweetener, almond extract, and baking soda, and process until smooth. Stir in the chocolate chips* and cherries. 
  2. Roll the dough into golf ball sized pieces and arrange on the cookie sheets. If you prefer your cookies to be more disc-like, then flatten the balls slightly on the sheet, if not, then they will cook into small mounds. Bake for 10 minutes.
Notes*
If you add the chocolate chips to the food processor and pulse to incorporate them, then your cookies will have chocolatey fudge swirls in them. Yum! 


Thursday, September 11, 2014

Vegan Peanut Butter Cups

I grew up 30 minutes away from Hershey Park, so my love affair with Hershey candy started at an early age. Unfortunately for Hershey, as I got older I fell out of love with sugary treats and fell in love with decadently dark chocolate. However, there are some flavor combinations a girl doesn't like to go without, take peanut butter cups for instance.

While I'm on the subject of peanut butter cups, I'll take a moment to acknowledge what a brilliant idea they were! Thank you Mr. Milton Hershey for your chocolate bars, and thank you Mr. George Washington Carver for introducing peanut butter in the 1880s. Okay, enough history for the day, lets whip up some homemade peanut butter cups.

For this recipe you can either make your own chocolate cups, it's incredibly easy, or buy some chocolate cups for desserts or cordials at a grocery store. Below, I give the instructions on how to make your own, but just skip that part if you buy cups from the store.

Vegan Peanut Butter Cups


Prep Time: 45 minutes
Cook Time: 0 minutes
Total Time: 45 minutes

Makes approximately 10 mini cups

Ingredients:
  • 6 oz chocolate bar or chocolate chips (make sure to use vegan chocolate to keep the recipe vegan), I prefer 70% or darker
  • 1/2 cup peanut butter, home made or store bought, melted
  • mini cupcake liners
Instructions:
  1. Place a mini cupcake pan in your freezer for at least 15 minutes. If you are using pre-made chocolate cups, then skip to step 2. Melt the chocolate in a double boiler on the stove. Once the chocolate has melted, pour about 1/2 tbs into a mini cupcake liner and roll the liner around to coat the sides. Remove the pan from your freezer and place your chocolate coated-liners in the tin. Set the pan in the fridge and let the chocolate set for 15 to 20 minutes. 
  2. Remove the pan from the fridge. Spoon melted peanut butter into the chocolate cups until they are 80% full. Return the pan to the fridge and let the peanut butter set for 10 minutes. 
  3. Remove the pan from the fridge and top the cups with the remaining chocolate, filling the cups to the top. Return the pan to the fridge for the last time and let the chocolate set up for an additional 10 to 15 minutes. Then devour them!


Wednesday, September 10, 2014

Balsamic Oven Roasted Vegetables

There are so many delicious vegetables out there that I find it hard to believe people who claim they don't like vegetables. Seriously!? C'mon. No vegetables at all? Well, if you are not willing to try new things, then this post is not for you. However, if you are willing to try vegetables, and you like the flavor combination of oil and vinegar, then give these a shot. They are good. No, really! They are delicious!!! You can eat them as a side or toss them in a pasta dish. Or, if you are like me, you can just eat them from a bowl...until they are gone.


Balsamic Oven Roasted Vegetables


Prep Time: 10 minutes
Cook Time: 45 minutes
Total Time: 55 minutes

Serves 4

Ingredients:
  • 3-4 large carrots, peeled and chopped in to 1/2 inch pieces
  • 1 onion, sliced into 1/2 inch wide strips
  • 1 cup cherry tomatoes or 2-3 large tomatoes
  • 2-3 zucchini and/or squash, cut in to 1/2 inch pieces
  • Any additional vegetables that you love, broccoli, peppers, etc., chopped
  • 2 tbs olive oil
  • 1 tbs balsamic vinegar
  • 1/2 tsp salt
  • 1/2 tsp ground pepper
Instructions:
  1. Preheat the oven to 425 F. Line a baking sheet with parchment paper and set aside. 
  2. In a large bowl, mix together the olive oil, vinegar, salt and pepper. Add the cut vegetables, and toss to combine. 
  3. Spread the vegetables evenly across the lined baking sheet and cook until the vegetables start turning brown around the edges and are easily pierced with a fork, 45-50 minutes. Remove from the oven and enjoy!

Tuesday, September 9, 2014

Garlic and Thyme Sauteed Green Beans

My girlfriends and I like to get together, watch chick-flicks, and eat... Who doesn't?! I'm always introducing new fruits and vegetables and trying to win people over to the veggie-lover side. I made these when my neighbor was over. She had confessed that green beans were not her favorite, but that she would give mine a try. As we sat down to watch The Birdcage she looked at me very seriously and said, "I like 'em!" She very well may be on the road to the dark side. Mwahahahah...(devious laughter)


Garlic and Thyme Sauteed Green Beans

Prep Time: 10 minutes
Cook Time: 20 minutes
Total Time: 30 minutes

Serves 4


Ingredients: 
  • 1 lb green beans, ends trimmed
  • 1 tbs and 1 tsp olive oil
  • 1/2 cup water
  • 1/4 tsp ground thyme
  • 1/2 tsp salt
  • 1/4 tsp pepper
  • 3 cloves garlic, minced
Instructions:
  1.  Heat 1 teaspoon of olive oil  in a 12 inch non-stick skillet over medium-high heat until smoking. While the oil is heating, combine the rest of the olive oil, thyme, salt, pepper, and minced garlic in a small bowl and set aside. Add the beans to the skillet and cook, stirring occasionally until spotty brown, 6 to 8 minutes. 
  2. Add water, cover, and cook for 2 to 3 minutes. Remove lid, increase heat to high, and cook until the water evaporates. 
  3. Add the olive oil mixture and saute until the beans are bright green and tender but still crisp and beginning to wrinkle, 1 to 3 minutes.

Monday, September 8, 2014

Apple Ginger Breakfast Muffins

Apple Ginger Breakfast Muffins


Prep Time: 15 minutes
Cook Time: 30 minutes
Total Time: 45 minutes


Ingredients:

  • 1 cup oat flour
  • 1 cup gluten free flour (I used Bob's Gluten Free)
  • 2 tsp xantham gum
  • 1 tsp salt
  • 1 tsp baking soda
  • 1/2 tsp baking powder
  • 1/2 tsp cinnamon
  • 2 ripe bananas
  • 1/2 cup almond milk
  • 1/4 cup apple sauce
  • 1/3 cup brown sugar
  • 1 tsp ginger juice
  • 1/4 cup crystallized ginger, chopped
  • 2 medium apples, peeled, one diced into small pieces and one chopped into 1/2" pieces


Instructions:
  1. Preheat the oven to 350 F. 
  2. In a large bowl, combine the flours, xantham gum, salt, baking soda, baking powder, and cinnamon.
  3. In a separate bowl, mash the bananas and add the almond milk, apple sauce, brown sugar, and ginger. 
  4. Add the banana mixture to the flour mixture and stir until just combined. Stir in the apples and the crystallized ginger. 
  5. Line a muffin tin with liners and fill each one 3/4 full. Bake for 30 minutes. Remove from the oven and let cool 10 minutes before removing them from the pan. 

Sunday, September 7, 2014

Savory Butternut Squash Soup

Several years ago, I asked my roommate if she had ever had butternut squash soup. Having grown up in the North, I wasn't sure which foods were commonly eaten in the North that weren't eaten in the South. She had not tried the soup before, but that did not stop her. We found a great recipe in a magazine that we both liked very much. Over the years, we have made some changes to customize it to our personal preferences, making it a bit thicker and more savory. Now we have a fall staple that we enjoy as long as our grocery store stocks butternut squash.

Savory Butternut Squash Soup


Prep Time: 10 minutes
Cook Time: 45 minutes
Total Time: 55 minutes

Serves 6-8

Ingredients:
  • 1 large bell-shaped butternut squash, peeled, seeded, and cut into 2" chunks
  • 2 tablespoons olive oil
  • 2-3 leeks, quartered and sliced into thin strips, and washed thouroughly
  • salt
  • 5 cups vegetable broth
  • 1/2 tsp ground thyme
  • 1 bay leaf
  • Pinch of cayenne
Instructions:
  1. Place squash in a microwave safe dish, cover and microwave until it is easily pierced by a knife, 15-20 minutes. Remove the squash from the microwave and set aside. If you don't like to use or don't have a microwave, you can toss the squash in 2 tbs of olive oil and roast on a parchment lined baking sheet at 425 F for 45 to 60 minutes. 
  2. Heat the oil in a Dutch oven over medium-high heat. Add the squash, leek, and 1 tsp salt, stirring occasionally, until the squash starts to break down and a brown frond starts to form in the bottom of the pot, 10 to 12 minutes. 
  3. Add half of the broth and loosen the frond by scraping the bottom of the pot. Add the remaining broth, thyme, bay leaf, and cayenne. Lower the heat to medium and simmer until the leeks are fully tender, 7 to 10 minutes.
  4. Remove the bay leaf and process the soup in small batches. Return the processed soup to the pot and simmer to heat through. Add additional broth or water to thin the soup, if you prefer a thinner soup. Add salt and pepper to taste.

Saturday, September 6, 2014

Spring Roll Samosas

We are always trying crazy combinations at my house! So we decided to fuse Asian and Indian cuisine in this oddly delicious meal. 

Spring Roll Samosas


Prep Time: 10 minutes
Cook Time: 1 hour
Total Time: 1 hour 10 minutes

Yields 8 Spring Rolls

Ingredients:

Spices
  • 1 tsp fennel seeds
  • 1/2 tsp ground cumin
  • 1 tsp ground mustard
  • 1/4 tsp ground turmeric
Filling 
  • 2 lbs potatoes (4 medium), cut into 1/2 inch chunks 
  • 1 1/2 tsp salt
  • 2 tbs olive oil
  • 1 medium onion, minced
  • 3 medium garlic cloves, minced 
  • 1 tsp ginger juice
  • 1/2 cup frozen peas
  • 8 wanton rice wrappers
Instructions:
  1. Preheat the oven to 350 F and line a baking sheet with parchment paper. Combine the spices and set aside. Cover the potatoes with an inch of water and sprinkle in 1 tsp of the salt. Bring the water to a boil, then reduce to a simmer and cook the potatoes until they are tender, 12 to 15 minutes. Drain the potatoes and set aside.
  2. Heat the oil in a large non-stick skillet over medium-high heat until shimmering. Add the spices and saute until they are fragrant, about 10 seconds. Add the onion and 1/2 tsp salt and cook until softened, 5 minutes. Stir in the garlic and ginger and cook for 30 seconds. 
  3. Add the drained potatoes and cook until they brown around the edges, 5 minutes. Stir in the peas to combine.
  4. Soak a wanton wrapper in a dish of water until softened, 15-20 seconds. Spoon some potato filling into the center of the wrapper, roll the wrapper and tuck in the sides. 
  5. You can eat them now, but we prefer to bake them. If you want to bake the spring rolls, place them on the baking sheet and bake them until they are crisp and golden brown,  30-40 minutes. I topped mine with hot sauce, get creative and have some fun with them.

Thursday, September 4, 2014

Late Summer Harvest Peach Breakfast Muffins

In an attempt to use up the last of my delicious peaches, I whipped up some hearty peach muffins. They are filling and healthy enough to be a grab-and-go breakfast option. 

Late Summer Harvest Peach Breakfast Muffins

Prep Time: 15 minutes
Cook Time: 20 minutes
Total Time: 35 minutes

Yields 1 dozen


Ingredients:
  • 1 cup gluten free flour (I used 1/2 cup white rice flour, 1/4 cup brown rice flour, and 1/4 cup tapioca flour)
  • 1/2 cup gluten free oat flour
  • 1/2 cup gluten free old fashioned rolled oats
  • 2 tsp baking powder
  • 1 tsp cinnamon
  • 3/4 tsp baking soda
  • 1/2 tsp fine sea salt
  • 3/4 cup almond milk (or milk of your choice)
  • 1 flax egg (1 tbs ground flax and 3 tbs water)
  • 1/3 cup sugar or sweetener of choice
  • 1/2 cup peach preserves (I used Polaner)
  • 2 ripe but firm peaches cut into 1/2" cubes
 Instructions:
  1. Preheat the oven to 350 F and line a cupcake tin with paper liners. Mix together the flax egg ingredients in a small bowl and set aside.
  2. In a mixing bowl, mix together the gluten free flour blend, oat flour, oats, baking powder, cinnamon, baking soda, and salt. 
  3. Pour the milk, flax egg, sugar, and preserves over the dry ingredients and stir until just combined. Then add the peaches and stir them into the batter. 
  4. Scoop the batter into the cupcake tin and bake until a toothpick inserted in the center comes out clean, 18-20 minutes. After the muffins have baked, let them cool in the pan for 5-10 minutes before removing them from the tin.
Adapted from Pickles & Honey

Wednesday, September 3, 2014

Strawberry Basil Vinaigrette

It's been very hot here in the south these past few days, and as such, hydration is key! But you can only drink so much water. When it's especially hot, I like to opt for a light salad topped with fruit, nuts, seeds, and a light dressing. I felt like experimenting a bit with some fruit we had around the apartment, the result was this salad dressing.

Strawberry Basil Vinaigrette

Prep Time: 10 minutes
Cook Time: 0 minutes
Total Time: 10 minutes

Makes about 1 cup 


Ingredients:

  • 8 oz. strawberries
  • 1 tbs fresh basil, chopped
  • 2 tsp brown sugar
  • 1 tsp apple cider vinegar
Instructions
  1. Combine all ingredients in a bullet or food processor and process until smooth. Pour over your favorite salad. 
  2. Store any extra in an airtight container in the fridge. 


Tuesday, September 2, 2014

Peach Polenta Upside-Down Cake (With Vegan Option)

It's almost the end of peach season down south, but I couldn't let it pass without making this cake one last time. Whenever I try to explain this dessert to people, I usually get some pretty odd reactions, as if the idea of a cake/cornbread was a little too far fetched. Luckily, the people who have tried it, have loved it, so give it a try and make up your own mind...I'm sure you'll love it too!

The original recipe called for loads of butter, sugar, and cream. I've lightened it up and adapted it to be gluten free and I've offered a vegan option. I have made it following the vegan substitutions several times and it is superb!


Peach Polenta Upside-Down Cake (Vegan Option)

Prep Time: 10 minutes
Cook Time: 40 minutes
Total time: 50 minutes

Serves 8


Ingredients:

  • 2/3 cup butter or apple sauce 
  • 1/4 cup and 1/2 cup sugar
  • 3-4 medium ripe peaches, skin on, pitted, and cut into 3/4" wedges
  • 1 cup polenta or coarse yellow cornmeal
  • 3/4 cup gluten free flour blend or all purpose flour(Bob's gluten-free, or your preferred blend, I used 1/2 cup white rice, 1/8 cup brown rice, and 1/8 cup tapioca starch) 
  • 1 1/2 tsp baking powder
  • 1 1/4 tsp salt (I prefer kosher for this recipe)
  • 3 eggs or flax eggs (3 Tbs flax and 6 Tbs water, mix together and let rest 10 minutes)
  • 1/2 tsp vanilla extract
  • 1/2 cup almond milk, or milk of your choice
Instructions:
  1. Preheat the oven to 350 F. Melt 3 Tbs of the butter, or heat 3 Tbs apple sauce in a 10" iron-skillet over medium heat, making sure to brush it up the sides of the pan. Sprinkle 1/4 cup suger evenly across the bottom of the skillet and cook until the sugar starts to turn a golden brown, about 3 minutes. Arrange the peaches around the outside of the skillet, then fill in the center of the skillet with the remaining slices. Reduce the heat to medium-low, and continue to cook until the juices are bubbling and the peaches begin to soften 10-12 minutes. Remove the pan from the heat.
  2. While the peaches are cooking, combine the polenta, flours, baking powder, and salt in a bowl. Beat the remaining 8 Tbs butter or apple sauce and 1/2 cup sugar for 3 minutes. Add the eggs, scrape the bowl down, then mix in the vanilla and milk. Add the flour mixture to the bowl and mix until just combined. 
  3. Drizzle the batter over the peaches and smooth out the top with your spatula. Bake until golden, and a tester inserted into the middle of the cake comes out clean 30 minutes. Let the skillet cool for 10 minutes, then run a knife around the edge of the pan. Quickly invert the pan onto a plate or cutting board and tap the bottom of the skillet to loosen the cake and peaches. Lift the skillet and reposition any renegade peaches. Cool slightly before serving. 
Adapted from Martha Stewart


Monday, September 1, 2014

Vegan Strawberry-Rhubarb Crisp

Today kicks off VeganMoFo! Day 1!!! I do not normally follow a vegan diet, but I have friends and family who do. Therefore, I accept the challenge of VeganMoFo and will post at least 20 vegan posts this month! I am so excited!!!


I was walking through the grocery store when I spotted some fresh rhubarb. I had always loved the strawberry rhubarb pies that were sold in the area where I grew up, but I had never experimented with rhubarb before. I decided that would not hold me back. I selected a few stalks of rhubarb, bagged them, bought them, and baked them. The result was this delicious little dessert!

Vegan Strawberry-Rhubarb Crisp

Prep Time: 10 minutes
Cook Time: 50 minutes
Total Time: 1 hour

Serves 6


Ingredients: 

Filling:

  • 4 stalks of rhubarb, cut into 1/2 inch pieces
  • 16 oz. strawberries, slices
  • 1/4 tsp cinnamon
  • 1/4 cup tapioca starch
  • 1/2 cup sugar
Crisp:
  • 8 oz ground almonds
  • 1/2 cup old fashioned rolled oats
  • 4 tbs brown sugar
  • 2 tsp ground flax
  • 1/2 tsp cinnamon
  • 6 tbs applesauce
Instructions:
  1. Preheat the oven to 375 F. 
  2. In a large bowl, combine the rhubarb, strawberries, cinnamon, tapioca starch, and sugar, stirring to combine. Let the mixture sit while you prepare the crisp topping. 
  3. In a separate bowl combine the almonds, oats, sugar, flax, cinnamon, and applesauce until just combined. Do not over mix. 
  4. Pour the strawberry mixture into a square glass baking dish and bake the fruit for 10 minutes. 
  5. Remove the fruit filling and sprinkle the crisp topping over the dish. Return the dish to the oven and bake for 40 minutes or until the topping is a dark brown. 

Saturday, August 23, 2014

Gluten Free Peasant Bread

When I was little, we used to bake bread...and devour it immediately after it came out of the oven. At my apartment, my bread eating habits have not changed, however my diet has. In the gluten-free world, I've found most breads to be dry, crumbly, crusty and not in a good way. With this recipe, the perfect crusty outside and chewy inside join together, resulting in baked perfection. I hope you enjoy it as much as I do!


Prep Time: 2 hours 10 minutes
Cook Time: 30 minutes
Total Time: 2 hours 40 minutes

Makes 1 loaf

Ingredients:

  • 1 cup lukewarm water, it's important that it is not too hot!
  • 1 1/2 tsp sugar
  • 1 1/2 tsp rapid rise yeast
  • 1 cup white rice flour
  • 1/2 cup brown rice flour
  • 1/3 cup tapioca flour
  • 1/3 cup buckwheat flour
  • 2 tsp xantham gum
  • 1 tsp kosher salt
  • 2 egg whites
  • 2 tbs butter, to coat the pan
Instructions:
  1. Combine the water and sugar, pour the yeast over the water, no need to stir, and let proof for 10-15 minutes until frothy. 
  2. While the yeast proofs, combine the flours, gum, salt, and egg whites. 
  3. Once the yeast has proofed, pour it over the flour mixture and combine with a spatula. 
  4. Cover the bowl with plastic wrap and allow the dough to rise in a warm place for 1.5 to 2 hours.*
  5. Butter an oven safe bowl or loaf pan. Transfer the dough to the buttered bowl or pan and cover with plastic wrap. Place in a warm place, I set mine on the oven while it preheats, and allow it to rise for 30 more minutes while the oven preheats to 425F. 
  6. After the second rise, bake the bread for 30 minutes. Remove the bread from the oven, invert it onto a wire rack, and allow it to cool or don't and dig in!


Notes

*I will turn my oven on to 350 F for 1 minute, then turn it off again. This creates a warm space for the bread to rise.


Adapted from Alexandra Cooks


Wednesday, August 20, 2014

Incredible Tikka Masala Sauce

Where I live, there is this incredible Indian restaurant. Their food is unbeatable, but is it recreatable? I at least had to try. There Tikka Masala is out of this world, so naturally that had to be my first challenge. With this recipe, I have definitely come close!

Incredible Tikka Masala Sauce


Prep Time: 10 minutes
Cook Time: 1 hour
Total Time: 1 hour 10 minutes

Ingredients:
  • 1 Tbs olive oil
  • 3 cloves garlic, minced
  • 1 tsp ginger juice or 1/4 tsp ground ginger
  • 2 tbs tomato paste
  • 1/2 tsp garam masala (I used McCormick)
  • 1/2 tsp curry powder
  • 1 14 oz. can crushed tomatoes
  • 1/2 cup water
  • 1 tsp salt
  • 1/4 cup milk or cream of choice (both coconut and almond work very well)
Instructions:
  1. Heat the oil in a saucepan over medium heat. Add the garlic, ginger, tomato paste, and spices and cook about 5 minutes or until the spices are very fragrant, stirring every few minutes. 
  2. Add the diced tomatoes, water and salt and simmer over low heat for an hour, until thickened. 
  3. Pour in the cream or milk and keep warm until ready to serve. Goes great with chicken, paneer, or as a sauce for potatoes or other vegetables. 

India-Inspired Rice Pudding

I was planning on experimenting with some Indian Cuisine this weekend. I ran my plans by my roommate, to make sure she was up for Indian food for the weekend, and the only thing she asked was, "Will you make rice pudding?" To which I assured her it would be on the menu.

Neither of us are big on sugar or very creamy dishes, both of which are staples for a traditional rice pudding. A few years ago I experimented with making a rice pudding with an Indian flare, and we have been hooked ever since. This dish has a unique blending of flavors that combine most beautifully to form this great dessert.

India-Inspired Rice Pudding


Prep Time: 0 minutes
Cook Time: 1 hour 10 minutes
Total Time: 1 hour 10 minutes

Serves 6-8

Ingredients: 

  • 2 cups water
  • 1 cup medium-grain rice
  • 1/4 tsp salt (I prefer pink Himalayan sea salt because the flavor is more subtle)
  • 2 14 oz. cans light coconut milk (you can use full-fat for a creamier dessert if you like)
  • 1 1/2 cup almond milk 
  • 1/3 cup sugar or alternative granulated sweetener
  • 1 1/2 tsp vanilla extract
  • 1 tsp ground cardamom
  • 1/4 cup chopped dates (optional)
Instructions:
  1. Bring the water to a boil in a large, heavy-bottomed (preferably non-stick) saucepan. Stir in the rice and salt, cover, and simmer over low heat, stirring once or twice until the water is almost completely absorbed, 15 to 20 minutes. 
  2. Pour in the coconut and almond milk along with the sugar and bring to a simmer over medium-high heat, then reduce the heat to maintain a simmer. Cook, uncovered and stirring frequently, until the mixture begins to thicken, about 30 minutes. Reduce the heat to low and continue to cook for another 15 minutes, stirring every few minutes to prevent the rice from sticking to the bottom or scorching. 
  3. When a spoon can stand up in the pudding, remove from heat and stir in the vanilla and cardamom. If you like a sweeter pudding, add the chopped dates. We prefer this pudding served warm. Store in a Tupperware container and add up to 1 cup of milk, 2 tablespoons at a time, if serving chilled or at room temperature to loosen up the pudding before serving. 


Monday, August 18, 2014

Oven-roasted Curry Potatoes

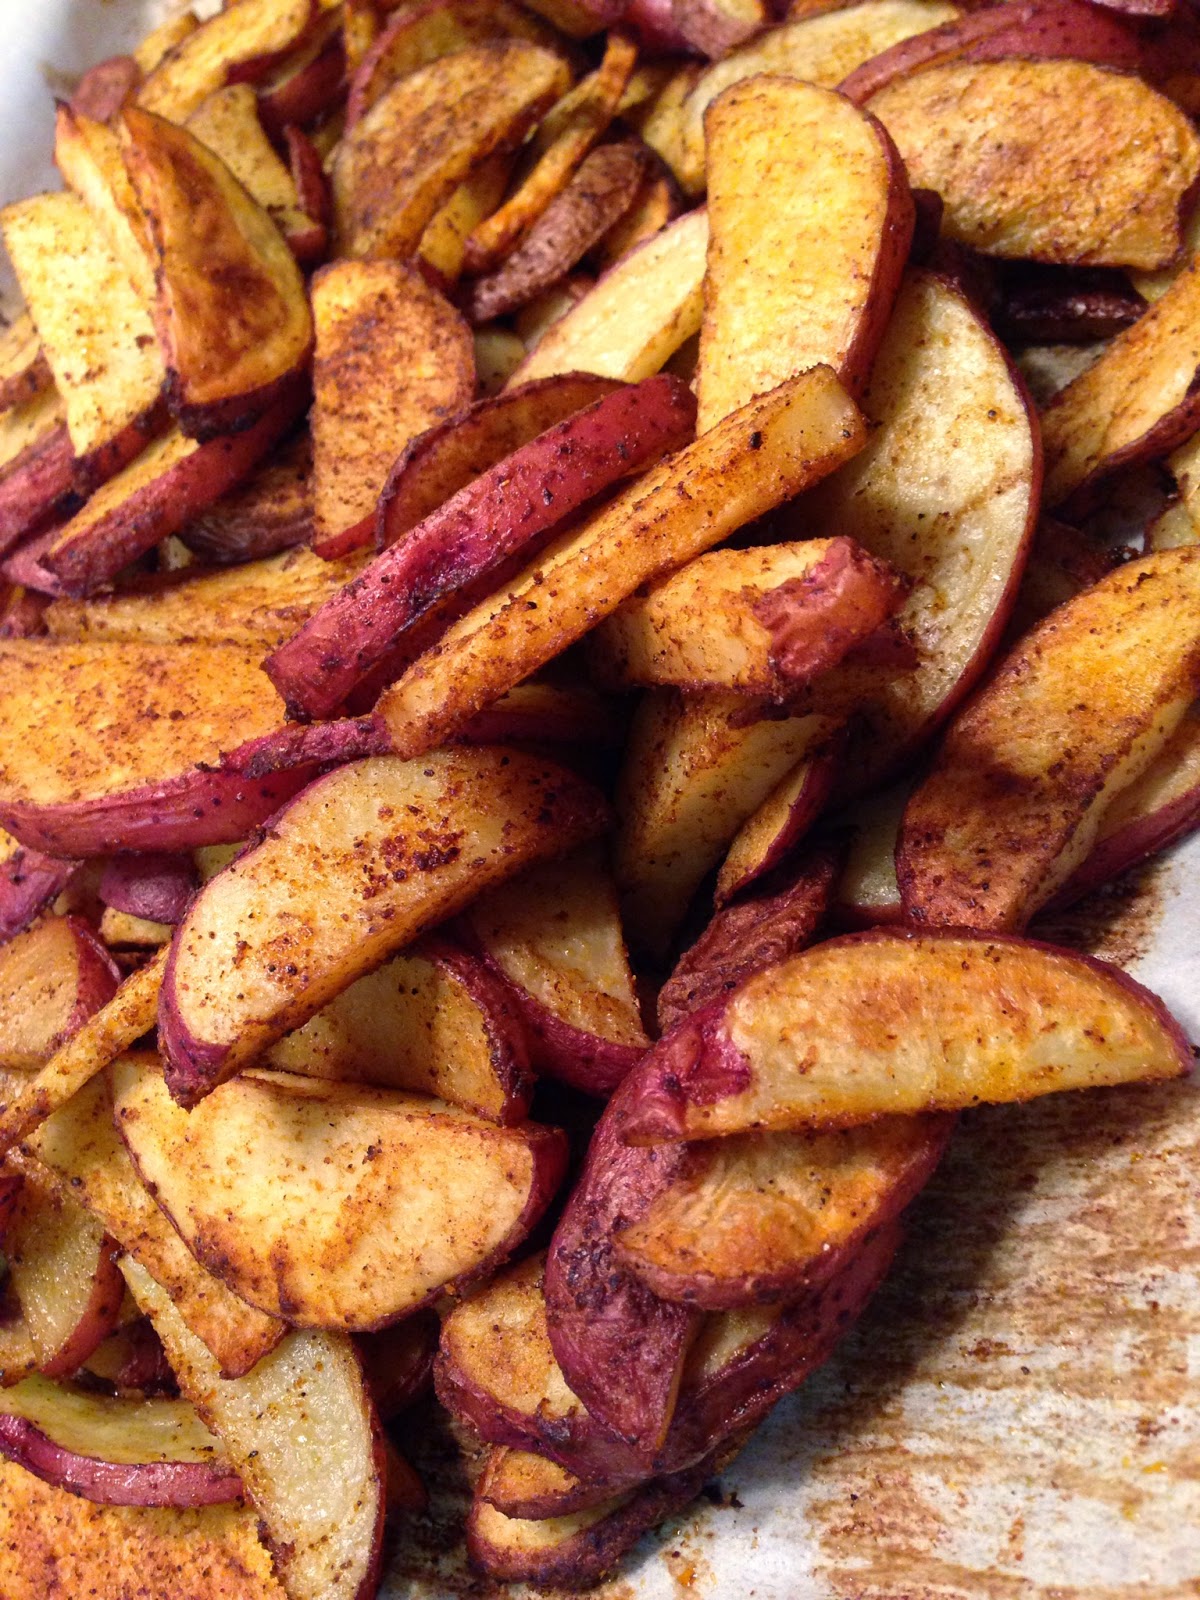
We are big fans of potatoes in this house. I've said it before and I know I'll say it again. However, I am not a big fan of frying, so we tend to roast our potatoes. We love to experiment with different spices and flavors. When ever we cook Indian food, my roommate requests these potatoes. Now, everyone can enjoy them!

Oven-roasted Curry Potatoes


Prep Time: 15 minutes
Cook Time: 30 minutes
Total Time: 45 minutes

Serves 4


Ingredients:

  • 4-5 medium to large potatoes 
  • 1 tbs olive oil
  • 1/2 tsp salt
  • 1/2 tsp curry powder
  • 1/4 tsp garam masala
  • 1/2 tsp ground cumin
  • 1/4 tsp ground red pepper
Instructions
  1. Preheat the oven to 450 F. Line a large baking sheet with parchment paper.
  2. Cut the potatoes in to hearty strips and let them soak in a bowl of water for 10 minutes.
  3. Drain the potatoes and toss them together with the oil and seasonings.
  4. Spread the potatoes out evenly on the prepared baking sheet and bake for at least 30 minutes. 

Saturday, August 9, 2014

Gluten-Free Greek Yogurt Waffles

These waffles are a great breakfast staple that come together very quickly and taste great. 

Gluten-Free Greek Yogurt Waffles


Prep Time: 10 minutes
Cook Time: 15 minutes
Total Time: 25 minutes

Yields 12 individual waffles, or 3 sets of 4


Ingredients:

4 eggs
1 1/4 cup almond milk
10 oz plain or flavored Greek yogurt
2 tsp vanilla extract
2 tbs butter, melted
2 tbs honey
1 1/2 cups white rice flour
1/3 cup buckwheat flour
1/3 cup tapioca starch
1 tsp xantham gum
3 3/4 tsp baking powder
1/2 tsp salt


Instructions: 
  1. In a large bowl, whisk the eggs. Add milk, yogurt, vanilla, butter, and honey and whisk until combined. 
  2. In a small bowl, mix the flours, baking soda, and salt. 
  3. Slowly add the dry ingredients to the wet ingredients until combined, but don't over mix.
  4. Pour the batter on to your waffle maker, close, and cook until golden brown. Top with your favorite toppings. We topped ours with blueberries and goat cheese. Delicious!